Contents
Ingredients
For the Cookies
- 1 cup unsalted butter, softened
- 1 cup granulated sugar
- ½ cup packed light brown sugar
- 2 large eggs
- 1 teaspoon vanilla extract
- 3 cups all-purpose flour
- 1 teaspoon baking soda
- ½ teaspoon salt
- ½ teaspoon ground cinnamon
- ¼ teaspoon ground nutmeg
For the Pecan-Stuffed Dates
- 24–30 pitted dates
- 24–30 pecan halves
For the Browned Butter Icing
- ½ cup unsalted butter
- 2 cups powdered sugar
- 1 teaspoon vanilla extract
- 2–4 tablespoons milk or heavy cream
- Pinch of salt
Optional Garnish
- Finely chopped pecans
- A light sprinkle of cinnamon
- Extra powdered sugar
Advertisement
Instructions
Step 1: Prepare the Dates
- If your dates still contain pits, carefully remove them.
- Make a small opening in the center of each date and gently press a pecan half inside. The date should close around the pecan so that the nut is tucked securely into the center.
- Set the stuffed dates aside while you prepare the cookie dough.
Step 2: Prepare the Cookie Dough
- In a large mixing bowl, cream together the softened butter, granulated sugar, and brown sugar.
- Beat for several minutes until the mixture becomes light, creamy, and fluffy.
- Add the eggs one at a time, mixing well after each addition. Stir in the vanilla extract.
- In a separate bowl, whisk together the flour, baking soda, salt, cinnamon, and nutmeg.
- Gradually add the dry ingredients to the butter mixture. Mix just until a soft cookie dough forms. Avoid overmixing, as this can make the cookies tougher.
- Take a portion of dough and flatten it gently in the palm of your hand.
- Place one pecan-stuffed date in the center.
- Carefully fold the dough around the date, completely covering it. Roll gently between your hands to create a smooth ball.
- Make sure the date is completely enclosed so the filling stays inside during baking.
- Repeat with the remaining dough and stuffed dates.
- Place the cookies on a parchment-lined baking sheet, leaving enough space between them for spreading.
- Preheat your oven to 350°F (175°C) .
- Bake the cookies for approximately 10–13 minutes , or until the edges are lightly golden and the centers look set.
- Do not overbake them. These cookies are especially delicious when they remain soft and tender.
- Allow them to cool on the baking sheet for several minutes before transferring them to a wire rack.
- Let them cool completely before adding the icing.
- Place the butter in a small saucepan over medium-low heat.
- Allow it to melt completely. Continue cooking gently, stirring frequently.
- The butter will begin to foam, and the milk solids will gradually turn golden brown. You should notice a rich, nutty aroma.
- Once the butter reaches a beautiful golden-brown color, immediately remove it from the heat and allow it to cool slightly.
- Whisk in the powdered sugar, vanilla, and a pinch of salt.
- Add the milk or cream one tablespoon at a time until you reach a smooth, spreadable or drizzle-able consistency.
- Once the cookies have completely cooled, spoon or drizzle the browned butter icing over the tops.
- For an extra festive appearance, sprinkle a few finely chopped pecans over the icing while it is still soft.
- Allow the glaze to set before stacking or storing the cookies.
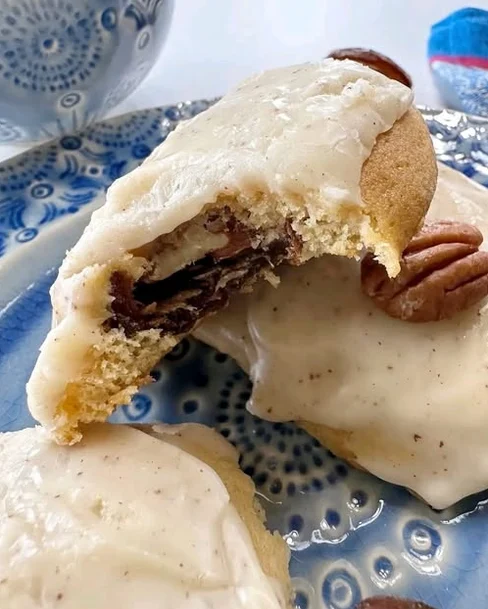
- The secret to these cookies is the combination of three layers of flavor .
- First, the cookie dough provides a soft, buttery exterior with subtle warm spices.
- Second, the center contains a naturally sweet, chewy date surrounding a crunchy pecan.
- Finally, the browned butter icing adds a rich, nutty sweetness that brings everything together.
- The date becomes wonderfully soft during baking, while the pecan provides a satisfying contrast in texture.
Advertisement
Notes
Store completely cooled cookies in an airtight container at room temperature for several days. For longer storage, they can be refrigerated in a sealed container. Allow them to come closer to room temperature before serving for the best texture. You can also freeze the baked cookies in an airtight freezer-safe container. Separate layers with parchment paper to prevent the icing from sticking.
Advertisement