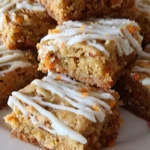


Welcome back, wonderful friends! Get ready to transform simple broccoli into everyone’s new favorite snack. These golden, crispy broccoli cheese balls are the perfect way to make vegetables exciting for the whole family. Whether you’re looking for a healthy appetizer, kid-friendly side dish, or party snack that disappears fast, this recipe delivers every time!
Why These Broccoli Cheese Balls Are Perfect
These baked broccoli cheese balls prove that healthy can be absolutely delicious. Packed with nutritious broccoli and melted cheese, they’re crispy on the outside and wonderfully cheesy inside. Best of all, they’re baked, not fried, making them a guilt-free treat that’s simple enough for everyday cooking yet impressive enough for entertaining.
Perfect for picky eaters, potluck gatherings, or anyone who wants to sneak more vegetables into their diet without sacrificing flavor!
Ingredients
- 2 cups broccoli florets
- 1 cup shredded cheddar cheese
- 1/2 cup breadcrumbs
- 1/4 cup grated Parmesan cheese
- 1 egg, beaten
- 1/4 teaspoon garlic powder
- Salt and pepper, to taste
Simple Step-by-Step Instructions
Step 1: Prepare Your Broccoli (5 minutes)
- Steam the broccoli florets until they’re tender when pierced with a fork (about 4-5 minutes)
- Let cool for a few minutes – no need to rush
- Finely chop the steamed broccoli into small pieces
- Important tip: Gently squeeze the chopped broccoli with paper towels to remove excess water – this keeps your balls from falling apart!
Step 2: Mix Everything Together (5 minutes)
- In a large mixing bowl, combine all your ingredients
- Add the chopped broccoli, cheddar cheese, breadcrumbs, Parmesan cheese, and garlic powder
- Crack in the beaten egg and add salt and pepper
- Mix gently but thoroughly until everything sticks together nicely
- The mixture should hold together when squeezed – if it’s too wet, add a few more breadcrumbs
Step 3: Shape Your Balls (5 minutes)
- Preheat your oven to 375°F (190°C)
- Line a baking sheet with parchment paper for easy cleanup
- Using clean hands, roll the mixture into small balls about 1 to 1.5 inches across
- Don’t worry about perfection – slightly irregular shapes add homemade charm!
- Place balls on the prepared baking sheet, leaving space between each one
Step 4: Bake to Golden Perfection (20-25 minutes)
- Bake for 10-12 minutes, then carefully flip each ball over
- Continue baking for another 10-13 minutes until they’re golden brown and crispy
- Look for that beautiful golden color – that’s when you know they’re ready!
- Let cool for 2-3 minutes before serving (they’ll be very hot inside)
Helpful Tips for Perfect Results
For Extra Crispiness: Lightly spray the balls with cooking oil before baking
Make-Ahead Friendly: Shape the balls and refrigerate for up to 24 hours before baking
Freezer Option: Freeze unbaked balls on a tray, then store in bags for up to 3 months
Serving Suggestion: Serve with ranch dressing, marinara sauce, or your favorite dip
Texture Check: If balls seem too soft, add more breadcrumbs; if too dry, add another beaten egg
Delicious Variations to Try
Cheddar and Mozzarella Stuffed Balls
Replace half the cheddar with mozzarella for extra melty goodness
Gluten-Free Broccoli Cheese Balls
Substitute regular breadcrumbs with gluten-free breadcrumbs or crushed gluten-free crackers
Spicy Broccoli Cheese Balls
Add a pinch of cayenne pepper or red pepper flakes for a gentle kick
Bacon Broccoli Cheese Balls
Fold in 2-3 strips of crumbled cooked bacon for extra savory flavor
Vegan Broccoli Cheese Balls
Use nutritional yeast instead of cheese and replace egg with a flax egg
Recipe Summary
- Prep Time: 15 minutes
- Cooking Time: 25 minutes
- Total Time: 40 minutes
- Servings: 4 generous servings (about 16-20 balls)
- Perfect for: Appetizers, side dishes, snacks, or party food
Why This Recipe Works for Everyone
These easy baked broccoli cheese balls are perfect for cooks of all skill levels. The straightforward method requires no special equipment, and the forgiving recipe means small variations won’t ruin your results. Whether you’re a busy parent looking for healthy snacks, someone new to cooking, or an experienced cook wanting a reliable crowd-pleaser, this recipe delivers consistent, delicious results every time.
Welcome back to making vegetables exciting, friends – let’s create something the whole family will love!