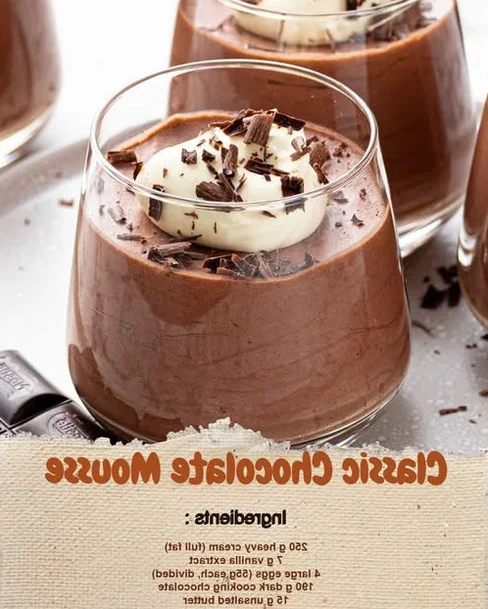
Prep timeared ahead of time. Why You Will Love This Chocolate Mousse Rich chocolate flavor: Dark chocolate provides a deep and satisfying taste. Light texture: Whipped cream and egg whites keep the mousse airy. Simple ingredients: No gelatin or complicated thickening agents are necessary. Make-ahead friendly: The mousse needs several hours to chill, making it convenient for entertaining. Elegant presentation: Individual glasses make the dessert look special with very little effort. Easy to customize: You can add berries, whipped cream, chocolate curls, cocoa, or other toppings. Smooth consistency: Proper melting and gentle folding create a creamy finished dessert.
Ingredients
- 125 g (4.5 oz) dark chocolate , preferably around 70% cocoa
- 10 g (0.35 oz) unsalted butter
- 3 large eggs , separated
- ½ cup full-fat whipping cream
- 3 tablespoons caster sugar
Optional Toppings
- Whipped cream
- Chocolate shavings
- Fresh raspberries
- Fresh strawberries
- Cocoa powder
- Mint leaves
- Finely grated chocolate
Optional Toppings
- Separate the eggs while they are cold.
- Place the egg whites in a completely clean mixing bowl.
- Put the yolks into a separate bowl.
- Allow the whites to sit at room temperature for a short period before whipping.
- Lightly whisk the yolks until smooth.
Advertisement
Instructions
- Place the chopped chocolate and butter in a microwave-safe bowl.
- Heat the mixture in short intervals.
- Stir thoroughly between each interval.
- Continue until the chocolate is almost completely melted.
- Stir until the remaining pieces disappear into the warm mixture.
- Set the chocolate aside to cool slightly.
- Do not heat the chocolate continuously for a long period. Chocolate can scorch or become grainy when overheated.
- The finished mixture should be smooth, glossy, and fluid.
- It should also be cool enough that it will not melt the whipped cream when the ingredients are combined.
- Pour the cold whipping cream into a clean mixing bowl.
- Use a hand mixer or stand mixer to beat the cream.
- Continue until firm peaks form.
- Stop mixing as soon as the cream reaches the desired consistency.
- Avoid overwhipping.
- Properly whipped cream should look smooth and creamy while holding its shape. If it becomes grainy or starts separating, it has been whipped too far.
- Place the whipped cream in the refrigerator while preparing the remaining components.
- Begin beating the egg whites using a clean whisk or electric mixer.
- Once they become foamy, gradually add the sugar.
- Continue beating until the mixture becomes glossy.
- Stop when firm peaks form.
- When you lift the whisk, the egg-white mixture should hold its shape.
- The sugar helps stabilize the whipped whites and adds sweetness to balance the dark chocolate.
- Do not rush this stage. Properly aerated egg whites are one of the ingredients responsible for the mousse’s light texture.
- Place the egg yolks in a small bowl and whisk them gently until they become smooth.
- The yolks do not need to be whipped extensively. Their main purpose is to add richness and contribute to the creamy texture.
- Add the whisked egg yolks to the whipped cream.
- Use a silicone spatula.
- Fold gently until mostly combined.
- Avoid vigorous stirring.
- At this point, the mixture should remain soft and airy.
- Check the temperature of the melted chocolate.
- Make sure it is warm or lukewarm rather than hot.
- Pour the chocolate gradually into the cream mixture.
- Fold gently with a spatula.
- Continue until the color is evenly chocolate brown.
- Do not beat the mixture aggressively. The goal is to combine the ingredients while maintaining as much volume as possible.
- If the chocolate is too hot, it can soften the whipped cream and reduce the volume of the mixture.
- This is the most important stage for creating a light mousse.
- Add approximately one-quarter of the whipped egg whites to the chocolate mixture.
- Fold gently to lighten the chocolate base.
- Add another portion of the egg whites.
- Fold from the bottom of the bowl upward.
- Rotate the bowl as you work.
- Continue adding the remaining egg whites in portions.
- Stop folding when there are no obvious white streaks.
- Do not stir in circles like you would with a normal batter. Folding gently helps preserve the tiny air bubbles trapped inside the egg whites.
- The finished mousse should look smooth, glossy, and airy.
- Prepare four clean serving glasses or dessert bowls.
- Divide the mousse evenly between them.
- Use a spoon or piping bag for a cleaner presentation.
- Smooth the tops if desired.
- Small glasses are ideal because chocolate mousse is rich and satisfying even when served in modest portions.
- Cover each glass with plastic wrap or place the glasses in a covered container.
- Refrigerate for at least 6 hours .
- For the best texture, allow the mousse to chill overnight.
- The chilling period allows the chocolate to firm and the mousse to develop its characteristic creamy consistency.
- Although it can be tempting to serve it early, adequate chilling makes a noticeable difference.
- Just before serving, decorate the mousse.
- Try one or more of these combinations:
- Whipped cream and chocolate curls
- Raspberries and grated chocolate
- Cocoa powder and mint
- Strawberries and chocolate shavings
- Plain whipped cream with a few berries
- Keep the toppings relatively light so they do not overpower the chocolate mousse.
Advertisement
Notes
Keep the mousse covered in the refrigerator. For the best quality, consume it within 2–3 days . Because this recipe contains eggs and dairy, keep it properly refrigerated and do not leave it sitting at room temperature for extended periods. Avoid freezing the finished mousse if you want to preserve its original airy texture. Freezing and thawing can alter the consistency and make the mousse less smooth.
Advertisement