Contents
Prep time25 minutes
Cook time20–24 minutes
Total timeApproximately 55–60 minutes
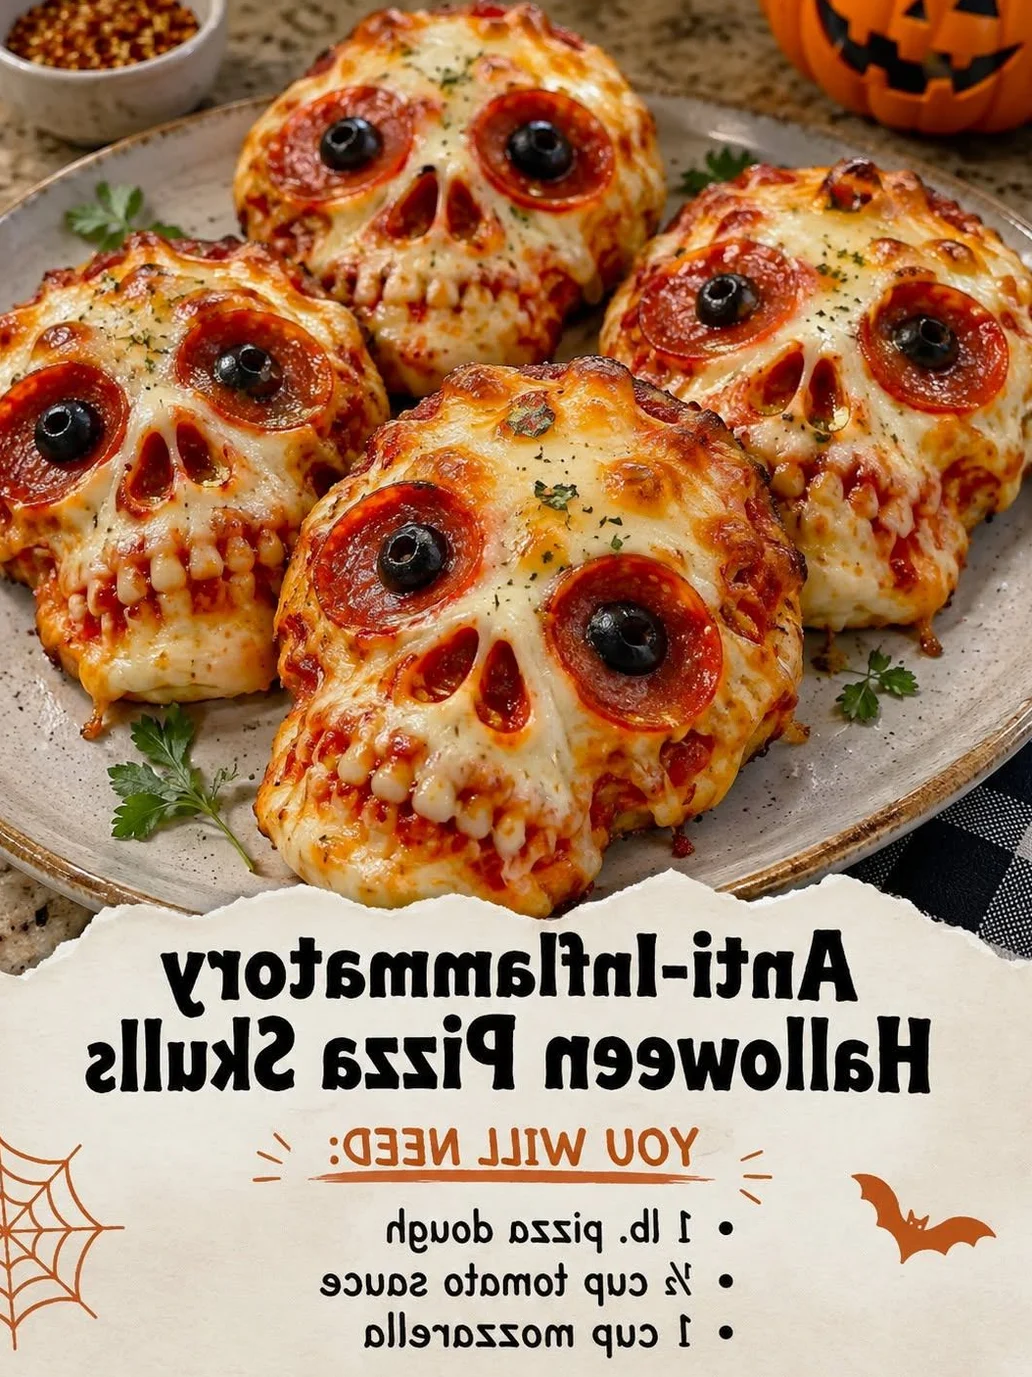
Servings6 large pizza skulls
Equipment
- 1 Nordic Ware 6-cavity 3D Skull Cakelet Pan (or silicone skull baking mold)
- Pastry brush
- Rolling pin
- Large baking sheet (to support the skull pan)
- Cutting board and sharp chef’s knife
- Small mixing bowl
Ingredients
For the Dough & Crust
- 16 oz (1 lb / 450 g) Prepared Pizza Dough: Store-bought artisan dough, fresh bakery dough, or homemade dough at room temperature.
- 2 tbsp Unsalted Butter: Melted, for brushing the interior cavities and exterior crust.
- 1 tbsp Extra-Virgin Olive Oil: For greasing the skull cavities to guarantee clean release.
- 1 tbsp Grated Parmesan Cheese: Finely powdered or microplaned.
- 1 tsp Garlic Powder: For brushing over the top crust.
- 1 tsp Dried Italian Seasoning: Oregano, basil, and thyme blend.
For the Savory Filling
- 2 cups (8 oz / 225 g) Low-Moisture Whole Milk Mozzarella: Shredded (low-moisture prevents the dough from becoming soggy).
- ¾ cup Thick Pizza Sauce or Marinara: Keep it thick so excess water does not leak during baking. Reserve an extra cup for dipping.
- 4 oz (115 g) Mini Pepperoni (or diced regular pepperoni): Roughly chopped into bite-sized quarters so they tuck cleanly into facial crevices.
- ¼ cup Cooked Italian Sausage (optional): Crumbled and drained of excess grease.
- ¼ cup Sliced Black Olives (optional): Drained thoroughly and patted dry.
Advertisement
Instructions
1. Prep the Skull Mold
- Position an oven rack in the center of the oven and preheat to 375°F (190°C) .
- In a small bowl, whisk together the melted butter, olive oil, and half of the Italian seasoning.
- Generously brush each skull cavity with the butter-oil mixture using a pastry brush. Pay special attention to the deep crevices around the eyes, nasal cavity, cheekbones, and teeth to ensure clean release after baking. Lightly dust the greased cavities with a fine pinch of grated Parmesan for extra crust crispness.
2. Portion and Roll the Dough
- Place the room-temperature pizza dough onto a lightly floured surface.
- Divide the dough into 6 equal portions (approximately 75–80 grams each).
- Using a rolling pin, roll each dough ball out into an oval or rough rectangle roughly ¼-inch thick and about 6 to 7 inches across. Avoid rolling the center too thin, as the sauce and cheese will exert pressure during expansion.
3. Line the Cavities
- Gently lift one rolled dough sheet and press it deep into the center of a skull cavity.
- Using the pads of your fingertips, press the dough firmly into the eye sockets, nose cavity, and teeth outlines, working out any trapped air pockets.
- Allow the excess dough edges to drape loosely over the rim of the cavity. Repeat across all 6 cavities.
4. Layer the Fillings
- Cheese Barrier: Place a small pinch of shredded mozzarella directly into the bottom of each cavity (which will become the face). This creates a barrier between the hot dough and wet sauce.
- Meats & Fillings: Add 1 tablespoon of chopped pepperoni and any cooked sausage or olives into the hollow.
- Sauce: Spoon 1 to 1.5 tablespoons of thick marinara over the filling. Do not overfill with sauce, as excessive steam can rupture the seams.
- Cheese Cap: Top with the remaining mozzarella until the cavity is full but not overflowing.
5. Seal and Vent
- Fold the overlapping dough flaps inward toward the center to seal the back of each skull completely.
- Pinch and crimp the dough seams firmly together using damp fingers to prevent the cheese from leaking out during the bake.
- Use the tip of a paring knife to poke 1 tiny steam vent hole into the folded back seam of each skull.
- Brush the exposed surface with the remaining garlic-herb butter.
6. Bake to Golden Perfection
- Place the skull pan directly onto the center oven rack.
- Bake at 375°F (190°C) for 20 to 24 minutes , or until the visible bottom crust is golden brown and firm to the touch.
- Remove from the oven and set the pan on a wire cooling rack. Let rest undisturbed for 8 to 10 minutes. This allows the crust to set and steam to escape, which guarantees the skull pops out cleanly without losing nose or tooth definition.
7. Unmold and Serve
- Invert a large rimmed baking sheet or cutting board over the skull pan.
- Firmly hold both the pan and board together and flip them over in one confident motion.
- Gently tap the bottoms of the skull molds. Slowly lift the pan straight up.
- Brush the hot skull faces lightly with any residual garlic butter. Serve warm on a dark platter surrounded by warm marinara sauce “blood” for dipping.
Advertisement
Nutrition
Calories: 345 kcal — · Protein: 15.2 g 30% · Fat: 16.5 g 21% · Carbohydrates: 34.0 g 12% Dietary · Saturated Fat: 7.8 g 39% · Fiber: 1.8 g 6% · Sugar: 3.2 g — · Sodium: 760 mg 33%
Advertisement