Contents
IngredientsFor the biscuit baseFor the creamy fillingFor the toppingFor the Christmas decorationInstructionsStep 1: Prepare the biscuit baseStep 2: Beat the cream cheeseStep 3: Prepare the vanilla creamStep 4: Fold everything togetherStep 5: Add the creamy fillingStep 6: Make the fluffy toppingStep 7: Decorate for ChristmasStep 8: Chill and serveNutrition
Prep timeares every holiday season. The moment it appears on the table, everyone gathers around, eager to enjoy a generous
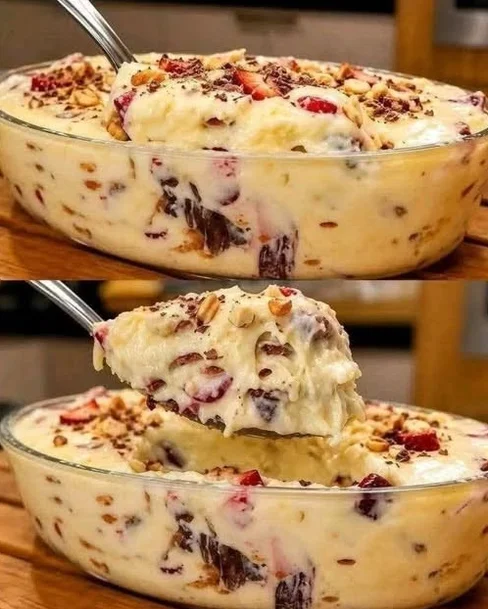
Servings! This No-Bake Christmas Cream Dessert is wonderfully smooth, rich, and sweet, with delicate layers of creamy vanilla filling and soft biscuits that melt in your mouth. The best part is that you do not need an oven, complicated baking techniques, or expensive ingredients to make it. Imagine a luscious vanilla cream layered with buttery biscuits, a fluffy whipped topping, and a beautiful festive decoration of chocolate shavings, cherries, or red and green sprinkles. After a few hours in the refrigerator, the layers come together into a chilled dessert that tastes as if you spent hours
Ingredients
For the biscuit base
- 300 g digestive biscuits or graham crackers
- 100 g unsalted butter, melted
- 2 tablespoons milk, if needed
For the creamy filling
- 400 g cream cheese, softened
- 1 can (about 395 g) sweetened condensed milk
- 2 cups (480 ml) cold heavy whipping cream
- 1 teaspoon vanilla extract
- 1 tablespoon lemon juice
- 1 packet (approximately 80–100 g) instant vanilla pudding mix
For the topping
- 1 cup (240 ml) heavy whipping cream, cold
- 2 tablespoons powdered sugar
- ½ teaspoon vanilla extract
For the Christmas decoration
- ¼ cup chocolate shavings or mini chocolate chips
- Red and green sprinkles
- Maraschino cherries or fresh strawberries
- Optional: crushed biscuits or chopped nuts
Advertisement
Instructions
Step 1: Prepare the biscuit base
- Place the biscuits in a food processor and pulse until they become fine crumbs. If you do not have a food processor, put the biscuits in a sealed bag and crush them with a rolling pin.
- Transfer the crumbs to a bowl and pour in the melted butter. Mix thoroughly until the texture resembles damp sand.
- Press the mixture firmly into the bottom of a 9-by-13-inch dish or a similar serving dish.
- Use the back of a spoon or the bottom of a glass to create an even, compact layer.
- Place the dish in the refrigerator for 20–30 minutes while preparing the filling.
Step 2: Beat the cream cheese
- Place the softened cream cheese in a large mixing bowl.
- Beat with an electric mixer for 2–3 minutes until smooth and creamy. Scrape down the sides of the bowl to remove any lumps.
- Add the sweetened condensed milk, vanilla extract, and lemon juice.
- Continue beating until the mixture is silky, smooth, and evenly combined.
- The lemon juice adds a subtle freshness that balances the sweetness of the condensed milk.
Step 3: Prepare the vanilla cream
- In a separate bowl, whisk the instant vanilla pudding mix into the cold heavy whipping cream according to the package directions, using the quantity of liquid specified by the package.
- Whip until the mixture thickens. If your pudding mix is designed to be prepared with milk, prepare it separately according to its instructions and fold it into the cream cheese mixture once thickened.
- This creates a rich vanilla layer with a pleasant, creamy texture.
Step 4: Fold everything together
- Gently fold the vanilla pudding mixture into the cream cheese mixture with a spatula.
- Use slow movements from the bottom of the bowl toward the top. This helps maintain a light texture while ensuring the filling is evenly blended.
- Avoid vigorous mixing once the whipped cream has been incorporated.
Step 5: Add the creamy filling
- Remove the chilled biscuit base from the refrigerator.
- Spoon the cream filling over the crust and spread it evenly with a spatula.
- Smooth the surface, paying special attention to the corners so every serving will have a generous layer of cream.
- Cover the dish and refrigerate for at least 4–6 hours, or preferably overnight, until the dessert is firm enough to slice.
Step 6: Make the fluffy topping
- Pour the cold heavy whipping cream into a clean mixing bowl.
- Add the powdered sugar and vanilla extract.
- Beat until medium-to-stiff peaks form. The cream should hold its shape without becoming grainy.
- Spread the whipped cream over the chilled dessert or transfer it to a piping bag to create decorative swirls.
Step 7: Decorate for Christmas
- Now comes the fun part!
- Sprinkle chocolate shavings over the top, add red and green sprinkles, and arrange cherries or strawberries to create a festive Christmas design.
- For a more elegant appearance, add small whipped cream rosettes around the edges and place a cherry on each one.
- You can also sprinkle crushed biscuits over the top for a delicate crunch.
Step 8: Chill and serve
- Return the decorated dessert to the refrigerator for another 30–60 minutes before serving.
- Cut into squares with a sharp knife, wiping the blade between cuts for neat portions.
- Serve cold and enjoy the creamy layers, buttery biscuit base, and sweet vanilla flavor in every bite!
Advertisement
Nutrition
Calories: 400–520 · Protein: 5–8 g · Fat: 25–36 g · Carbohydrates: 35–50 g · Sugar: 25–40 g
Advertisement