


Histats.com END
auto ads – kitchen -thisiz
- Telegram
end .top_nav
end #titles
✕ Menu
end #navigation
end .container
end #header
auto ads – kitchen -thisiz

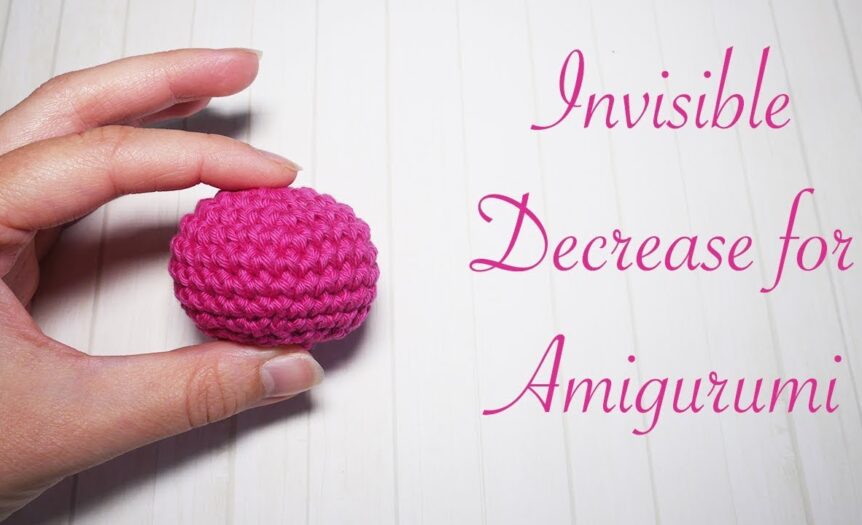
How to Do the Invisible Decrease in Amigurumi
Standard decreases in single crochet can leave bumps and gaps, allowing stuffing to show through in your amigurumi toys. The invisible decrease is a game-changing technique that hides the decrease stitch completely on the front of your work. Master this stitch to create clean, professional plushies.
auto ads – kitchen -thisiz
Standard decreases in single crochet can leave bumps and gaps, allowing stuffing to show through in your amigurumi toys. The invisible decrease is a game-changing technique that hides the decrease stitch completely on the front of your work. Master this stitch to create clean, professional plushies.
Contents
Materials & Tools RequiredStitch Abbreviations & GuideStep-by-Step InstructionsInvisible Decrease Step-by-StepPro Tips for Success & Pinterest StylingFrequently Asked QuestionsConclusion
Materials & Tools Required
To follow along with this project, you will need the following materials:
- **Yarn:** Worsted weight yarn.
- **Hook:** Appropriate hook.
- **Skill Level:** Advanced Beginner.
Stitch Abbreviations & Guide
Before beginning, review these common abbreviations used throughout the pattern:
- **SC:** Single crochet
- **DEC:** Decrease
- **INV DEC:** Invisible decrease
- **YO:** Yarn over
Step-by-Step Instructions
Follow these detailed instructions to complete the project. Keep your stitch counts consistent!
Invisible Decrease Step-by-Step
Pro Tips for Success & Pinterest Styling
Tension: Pull the yarn slightly tight after completing the decrease to lock it in place and prevent any hole.
Pinterest Share: A clean twostep photo sequence showing the hook passing through the front loops of two stitches is a top amigurumi search result.
Frequently Asked Questions
Q: Why does my invisible decrease look messy?
A: Make sure you are only catching the front loop. If you catch any part of the back loop, the stitch will bundle up and look bulky.
Q: Can I use this for flat projects?
A: Yes, but because it is only invisible on one side, it is best suited for 3D amigurumi where only the front side is visible.
Conclusion
Mastering this project is a wonderful milestone in your crochet journey. Once you finish, be sure to pin it on Pinterest to save it for your next crafting session and share your beautiful results with the community! Happy crocheting!
Visited 7 times, 1 visit(s) today
auto ads – kitchen -thisiz
CONTENT END 1
Last modified: ← Previous Story
What is Crochet Gauge and Why You Need to Measure It → Next Story
How to Fix a Dropped Crochet Stitch Without Raveling
#comments
end .content_inn
end #content
- Easy Crochet Snake Pattern for Beginners May 3, 2025
- Easy Crochet Orchid Flower Tutorial May 6, 2025
- Easy Crochet Chevron Blanket – Free Pattern May 11, 2025
- How-to: Make Baby Converse Booties with Crochet August 16, 2024
- Crochet Axolotl Plushie Pattern May 4, 2025
- How surprised he’ll be when he finds out March 11, 2013
Cached output. Cached time is 3600 seconds
- Accessibility 1
- Crochet 41
- Crochet Basics 2
- Crochet Blanket 8
- Crochet Christmas 3
- Crochet Flower 2
- Crochet Patterns 17
- Crochet Stitch 1
- Crochet Tutorials 40
- Featured 7
- Learn to crochet 2
- Staff’s Picks 3
- Uncategorized 23
#sidebar
end #core
end .container
- CONTACT US
- ABOUT US
- Terms of Use
- PRIVACY POLICY
- COOKIE POLICY
- DISCLOSURE POLICY
- Telegram
/#footer
/.wrapper_inn
/.wrapper
↑
/.upper class