The Science Behind the Perfect Soft & Chewy Chocolate Chip Cookies
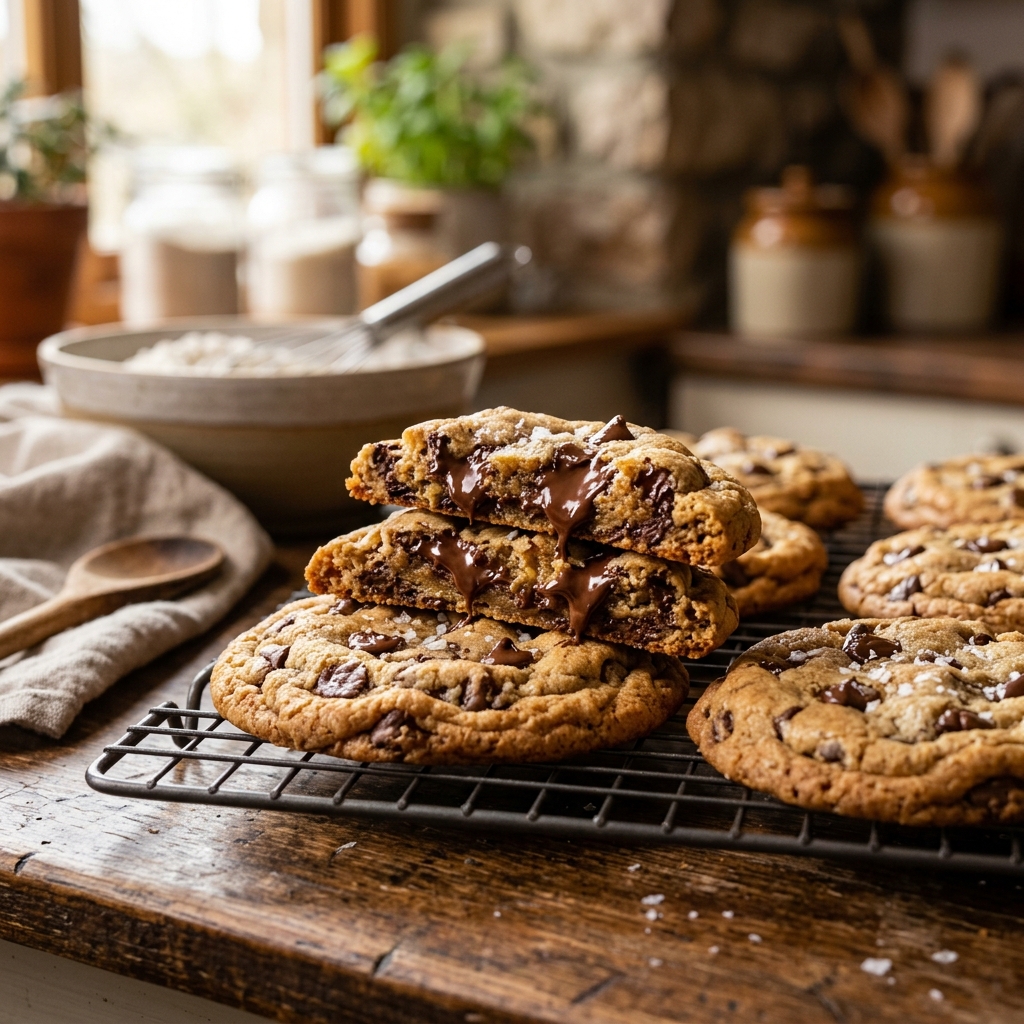
There is nothing quite like a freshly baked chocolate chip cookie, warm from the oven, with a crispy golden edge and a soft, gooey center. While thousands of recipes exist online, finding the one that delivers the ultimate texture—not too cakey, not too thin, and packed with chocolate—can feel like an endless quest. This recipe is the culmination of baking science, designed to yield the absolute best soft and chewy chocolate chip cookies you will ever make. By understanding how ingredients interact, you can bake bakery-quality cookies consistently in your home kitchen.
Why This Recipe Works: The Chemistry of Baking
Baking is chemistry, and every ingredient plays a vital role in determining the final texture and flavor of your cookies. Here is why this specific recipe produces such an exceptional cookie:
- Melted Butter vs. Creamed Butter: Instead of creaming softened butter with sugar, this recipe uses melted butter. Melting the butter releases its water content, which bonds with the flour to form gluten, resulting in a chewier cookie. It also gives the cookies a flatter, denser structure with crispy edges.
- The Sugar Ratio: We use a higher ratio of brown sugar to white granulated sugar. Brown sugar contains molasses, which adds moisture and acidity. The acidity reacts with the baking soda to create lift, while the moisture keeps the cookies soft and gives them a rich, caramel-like flavor. White sugar, on the other hand, promotes spreading and crispiness on the edges.
- Extra Egg Yolk: In addition to one whole egg, we add an extra egg yolk. The fat in the yolk adds richness, binds the ingredients together, and yields a tender, melt-in-your-mouth interior texture.
- Chilling the Dough: This is the most crucial step! Chilling the dough solidifies the fat, preventing the cookies from spreading too quickly in the oven. It also allows the flour to fully hydrate and the flavors to concentrate, resulting in a much richer flavor profile.
Ingredients You Will Need
Before you begin, gather your ingredients. For the best results, use high-quality ingredients, especially when it comes to the chocolate and vanilla:
- All-Purpose Flour: Provides the structure. Measure it carefully using the spoon-and-level method, or use a kitchen scale to avoid adding too much flour, which makes cookies dry and crumbly.
- Melted Butter: Melted and cooled slightly. Unsalted is preferred, but if you use salted butter, reduce the added salt by half.
- Dark Brown Sugar: Packed. You can use light brown sugar, but dark brown sugar contains more molasses, which increases the chewiness and caramel notes.
- Granulated White Sugar: Adds sweetness and helps create those crispy edges.
- Eggs: One large egg plus one egg yolk, at room temperature. Room temperature eggs emulsify much better into the dough.
- Pure Vanilla Extract: A generous amount (two teaspoons) is essential for that classic bakery aroma and flavor. Avoid artificial vanillin.
- Baking Soda: Our leavening agent. It helps the cookies rise and spread, and aids in browning.
- Salt: Essential for balancing the sweetness of the sugar and chocolate. Don’t skip it! Fine sea salt works best.
- Chocolate Chips & Chunks: A mixture of semi-sweet chocolate chips and chopped chocolate chunks from a high-quality bar. The chopped chunks create beautiful pools of melted chocolate throughout the cookie.
Step-by-Step Instructions
Follow these steps closely to achieve cookie perfection:
Step 1: Combine the Wet Ingredients
In a large bowl, whisk together the melted and cooled butter, packed dark brown sugar, and granulated white sugar until no lumps remain. The mixture should look wet and smooth. Whisk in the whole egg, the extra egg yolk, and the vanilla extract. Beat vigorously for about 1 minute until the mixture becomes pale and slightly thickened.
Step 2: Add the Dry Ingredients
In a separate bowl, whisk together the all-purpose flour, baking soda, and sea salt. Pour the dry ingredients into the wet ingredients. Using a wooden spoon or a rubber spatula, fold the ingredients together just until a dough forms. Do not overmix, as this will overwork the gluten and make the cookies tough instead of tender.
Step 3: Fold in the Chocolate
Gently fold in the chocolate chips and chopped chocolate chunks until they are evenly distributed throughout the dough. Reserve a handful of chocolate chunks to press onto the tops of the cookie dough balls before baking for a picture-perfect look.
Step 4: Chill the Dough
Cover the bowl tightly with plastic wrap and place it in the refrigerator for at least 2 hours, or up to 24 hours. Chilling is mandatory! If you skip this step, your cookies will spread thin and flat on the baking sheet.
Step 5: Scoop and Bake
Preheat your oven to 325°F (163°C). Line two large baking sheets with parchment paper or silicone baking mats. Use a cookie scoop (about 3 tablespoons of dough per cookie) to portion the dough. Roll the dough into tall balls rather than perfect spheres—this helps prevent excess spreading. Place the dough balls 2 inches apart on the prepared sheets. Press a few reserved chocolate chunks onto the top of each ball.
Step 6: Bake and Cool
Bake for 11-13 minutes. The edges should be golden brown and set, but the centers should still look slightly soft and underbaked. Do not overbake! The cookies will continue to cook on the hot baking sheet after you remove them from the oven. Let the cookies cool on the baking sheet for 5 minutes before transferring them to a wire rack to cool completely.
Chef’s Baking Tips
- The Pan-Banging Technique: For extra crinkly, chewy cookies, gently bang the baking sheet against the oven rack halfway through baking, and again when they finish. This deflates the cookies and creates beautiful ridges and a denser texture.
- Use a Kitchen Scale: Baking is precise. Measuring flour by volume (cups) can vary by up to 20% depending on how packed it is. Weighing your flour (usually 280 grams for this recipe) ensures consistent results every time.
- Make Them Round: If your cookies bake into irregular shapes, immediately place a large round cookie cutter or a glass over the hot cookies and gently swirl it around. This molds the cookies into perfect circles with neat edges.
- Room Temperature Eggs: Cold eggs will cause the melted butter to solidify and clump up in the batter. If you forget to pull them out, place the eggs in a bowl of warm water for 5 minutes before using.
Storage and Freezing
Storage: Store the baked cookies in an airtight container at room temperature for up to 5 days. To keep them extra soft, place a slice of white bread in the container. The cookies will absorb the moisture from the bread, staying soft for days.
Freezing Cookie Dough: You can freeze portioned cookie dough balls. Scoop the dough onto a tray, freeze until solid, then transfer the balls to a zip-top freezer bag. Bake directly from the freezer at 325°F, adding 1-2 minutes to the total baking time.
Frequently Asked Questions
Why did my cookies spread flat?
Cookies spread flat if the butter was too hot when mixed, if the dough was not chilled, or if the oven was too hot. Ensure your melted butter cools to room temp before mixing, and chill your dough for at least 2 hours.
Can I use self-rising flour?
No, self-rising flour contains baking powder and salt in preset proportions. This recipe specifically calls for baking soda, which interacts with the brown sugar’s acidity. Self-rising flour will yield a cakey cookie that tastes different.
What is the difference between baking soda and baking powder in cookies?
Baking soda creates a chewy, dense cookie because it spreads the dough and promotes browning. Baking powder causes cookies to rise up, producing a cakier, fluffier texture. For chewy cookies, baking soda is the preferred leavener.