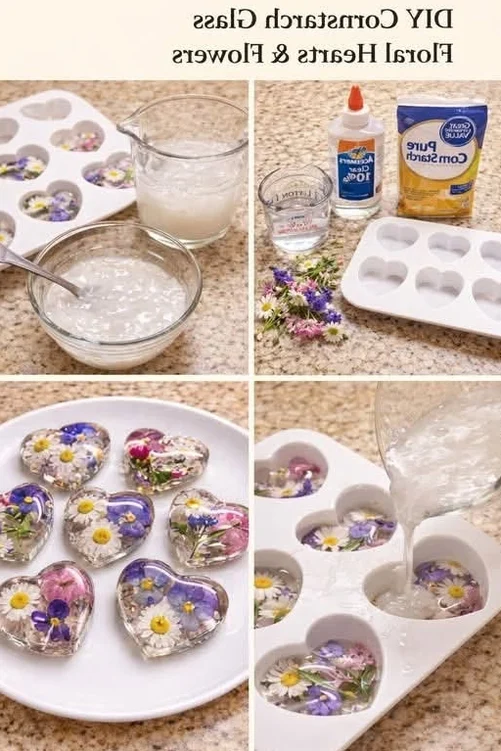
Cornstarch Glass Floral Hearts and Flowers are handmade ornaments crafted from a simple cooked dough made from cornstarch and baking soda. When shaped, colored, and dried, the dough develops a smooth, slightly translucent finish that mimics the look of frosted or sea glass. The shapes are cut with cookie cutters into hearts, flowers, and any other form you choose. A hole punched before drying allows them to be strung on ribbon, twine, or thread. Tinted with food coloring in soft, layered hues, the finished pieces glow gently when light passes through them.
Ingredients
- 1 cup cornstarch
- 1 cup baking soda
- ¾ cup water
- Food coloring (pink, turquoise, purple, or any colors)
- Fine glitter (optional)
- Metallic food coloring (optional)
- Ribbon or twine (for hanging)
- Mod Podge or clear craft sealant (optional, for sealing)
Instructions
- In a saucepan, combine 1 cup of cornstarch, 1 cup of baking soda, and ¾ cup of water. Stir until smooth and completely lump-free before applying heat.
- Place the saucepan over low heat and stir continuously. Cook until the mixture thickens from a liquid to a dough-like consistency and pulls away from the sides of the pan, forming a ball. This takes roughly 5 to 10 minutes. Remove from heat immediately to avoid overcooking.
- Transfer the dough to a plate or parchment paper and let it cool for 10 to 15 minutes until warm enough to be pliable but cool enough to handle. Cover loosely with a damp cloth to prevent drying out.
- Divide the dough into portions for each color. Add a few drops of food coloring to each portion and knead thoroughly until the color is even. Keep colors light for a better translucent effect.
- Working one color at a time, place the dough between two sheets of parchment paper and roll it out to approximately 1/4 inch thick. Roll evenly to prevent warping.
- Press cookie cutters firmly into the rolled dough to cut shapes. Transfer the shapes to a clean sheet of parchment paper. Re-roll scraps to cut more shapes.
- Before the dough firms up, use a straw or toothpick to punch a clean hole near the top of each shape for hanging. Widen the hole slightly if necessary.
- Place the shapes in a single layer on parchment paper with space between them. Air dry for 24 to 48 hours. Flip each piece gently after 12 hours to ensure even drying and prevent warping.
- Once fully dried, optionally sand rough edges with fine sandpaper (400 grit or higher) and seal with a thin coat of Mod Podge or clear craft sealant for longevity.
Notes
Do not rush the cooking process; low and slow heat prevents lumps. Always roll the dough between parchment paper to prevent sticking. Keep unused dough covered with a damp cloth. For the most glass-like effect, use less food coloring than expected. Flipping the pieces during drying is essential to prevent warping. Store finished pieces in a cool, dry place away from humidity.