Contents
Prep time45 minutes Infusion Time: 7-10 days (The most important and passive step!)
Total time7-10 days + 45 minutes (plus 2-3 hours for chilling/freezing) Recipe Intensity: Medium Technique: Moderate. The most critical aspects are zesting the lemons without getting the bitter white pith and patiently waiting for the infusion. Time Commitment: Low effort, high patience. The active work is under an hour, but the infusion requires about a week of waiting.
Equipment
- Sharp vegetable peeler or a fine Microplane zester
- Large glass jar with a tight-fitting lid (1-gallon size is perfect)
- Fine-mesh strainer
- Cheesecloth or a coffee filter
- Large saucepan
- Funnel
- 3-4 decorative glass bottles with airtight stoppers or corks (750ml total capacity)
Ingredients
- 10 large, organic, unwaxed lemons (Meyer lemons or Sorrento lemons are ideal) Why organic? The peel is the star of the show here. Using organic lemons ensures you are avoiding pesticides and waxes.
- Why high-proof? A higher alcohol content is crucial for efficiently extracting the fragrant essential oils from the lemon peels. 80-proof vodka will work, but the result will be weaker in flavor and will produce a thinner, less syrupy liqueur.
Advertisement
Instructions
Step 1: The Zest (40 minutes)
- Technique: Wash and thoroughly dry your lemons. Using your sharp vegetable peeler, carefully peel the outer yellow zest from the lemons. The goal is to get long, thin strips of the yellow part only .
- The Secret: Avoid the white pith at all costs. The pith is incredibly bitter and will ruin your limoncello with an unpleasant, harsh aftertaste. If you get some white on your strips, you can gently scrape it off with a paring knife.
Step 2: The Infusion (5 minutes + 7-10 days)
- Intensity: Minimal (Just requires waiting!)
- Action: Place all your lemon peels into the large glass jar. Pour the entire bottle of high-proof alcohol over the peels. Ensure all the peels are submerged.
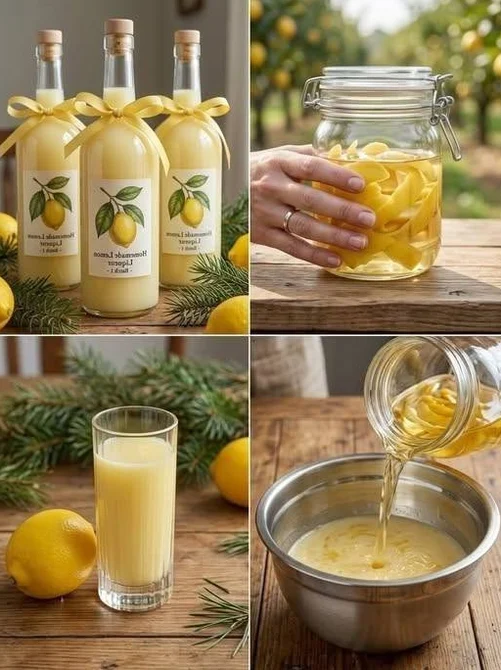
- The Wait: Seal the jar tightly and place it in a cool, dark place (like a pantry or a cupboard). Let it infuse for at least 7 days, and up to 10 days. Give the jar a gentle swirl every day or so. You’ll see the alcohol turn a brilliant, glowing yellow as it extracts the oils from the peel.
Step 3: The Simple Syrup (20 minutes)
- Intensity: High (Requires active attention on the stovetop)
- Action: While the infusion is doing its magic, you can prepare the simple syrup. Or, do it on the day your infusion is ready.
- How to: Combine the 4 cups of water and 4 cups of sugar in a large saucepan. Bring the mixture to a boil over medium heat, stirring frequently, until the sugar is completely dissolved. Do not let it boil for too long; just until the liquid is clear.
- Cool Down: Remove from the heat and allow the syrup to cool completely to room temperature. This is critical. Adding hot syrup to the alcohol will cause it to evaporate and lose its potency.
Step 4: The Marriage (15 minutes)
- Intensity: Low
- Action: After your infusion period is over, strain the mixture. Set up a fine-mesh strainer lined with a double layer of cheesecloth over a large bowl or pitcher. Pour the infused alcohol through the strainer to remove the lemon peels. Squeeze the cheesecloth to extract every last drop of that precious golden liquid.
- Combine: Pour the strained alcohol into your cooled simple syrup. Stir well to combine.
Step 5: Bottle and Rest (5 minutes + 1-2 hours)
- Intensity: Low
- Action: Using your funnel, pour the finished limoncello into your clean, dry glass bottles. Seal them tightly.
- The Final Wait: For the best flavor, let the bottled limoncello “rest” for at least 2 hours in the refrigerator. For optimal taste, it’s even better after a day or two in the fridge. Serve it ice cold , straight from the freezer for the most authentic experience!
Advertisement
Nutrition
Calories: ~180-200 kcal · Protein: 0g · Fat: 0g · Carbohydrates: 20-25g · Sugar: 18-22g · Sodium: 0-5mg
Advertisement