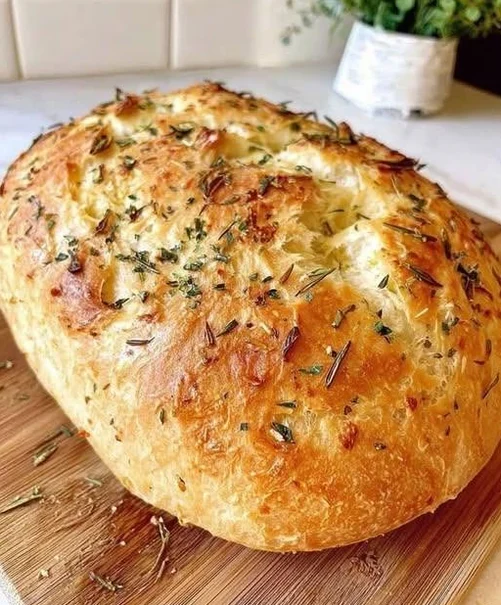
This homemade gluten-free no-knead bread is a simple artisan-style loaf made with just four everyday ingredients. The dough requires only a few minutes of mixing before it slowly rises to develop flavor and texture. Baking it in a preheated Dutch oven creates a beautifully crisp crust with a soft, tender interior. Whether served fresh with butter, toasted for breakfast, or paired with soup, this loaf is an easy and dependable gluten-free bread recipe for any home baker.
Ingredients
- 4 cups gluten free bread flour (I used King Arthur Gluten Free Bread Flour)
- ½ teaspoon instant yeast
- 1–1½ teaspoons fine sea salt
- 2¾ cups warm water, plus a few extra tablespoons if needed
Instructions
- Mix the Dough: In a large mixing bowl, combine the gluten-free bread flour, instant yeast, and fine sea salt. Pour in the warm water and stir until all of the flour is fully incorporated. If the dough feels dry or there are patches of flour remaining, add additional warm water one tablespoon at a time until a soft, sticky dough forms.
- First Rise: Cover the bowl with plastic wrap or a clean kitchen towel. Place it in a warm spot and allow the dough to rise for 16 to 18 hours. If needed, the dough can remain a little longer for additional flavor development.
- Preheat the Oven: When you’re ready to bake, place a Dutch oven with its lid inside the oven. Preheat the oven to 500°F (260°C) so both the oven and Dutch oven become thoroughly heated.
- Shape the Dough: Lightly dust a work surface with gluten-free flour. Carefully transfer the dough onto the floured surface. Gently fold and turn the dough about six times, using just enough flour to prevent sticking. Shape it into a smooth round loaf. Place the loaf seam-side down on the floured surface, lightly dust the top with flour, cover with a towel, and let it rise for 1 hour.
- Bake the Bread: Carefully transfer the dough into the hot Dutch oven. If desired, score the top with a sharp knife before or after placing it into the pot. Cover with the lid and immediately reduce the oven temperature to 450°F (232°C). Bake for 40 minutes with the lid on. Remove the lid and continue baking for 20 to 30 minutes, or until the crust becomes deep golden brown and crisp.
- Cool Completely: Remove the loaf from the Dutch oven and place it on a wire cooling rack. Allow the bread to cool for at least 1 to 2 hours before slicing so the crumb has time to fully set.
Notes
For the best flavor, let the dough rise for at least 16 to 18 hours. If your schedule allows, it can continue rising for up to 2 days. After the initial rise, you may refrigerate the covered dough for up to 3 days. Before baking, let it come back to room temperature, then shape and allow it to rest for about 2 hours. A warm location helps the dough rise more effectively. If your kitchen is cool, place the bowl near a warm appliance or sunny window. Always preheat the Dutch oven before adding the dough. This helps create excellent oven spring and a crisp artisan crust. Baking at high heat is important. Begin with a 500°F preheat, then reduce to 450°F once the bread goes into the oven. If using an instant-read thermometer, the center of the loaf should register 209–210°F (98–99°C) when fully baked. Allow the bread to cool completely before slicing to prevent a gummy interior. For extra flavor, sprinkle flaky salt over the loaf before baking or add chopped rosemary, thyme, oregano, sesame seeds, or poppy seeds to the dough. Storage: Room Temperature – Store leftover bread wrapped in a clean kitchen towel or inside a paper bread bag. It will stay fresh on the counter overnight. Freezer – Once completely cooled, freeze the whole loaf or individual slices in a freezer-safe bag for up to 2 months. To serve, thaw at room temperature or warm slices directly from frozen in a toaster, toaster oven, or conventional oven.