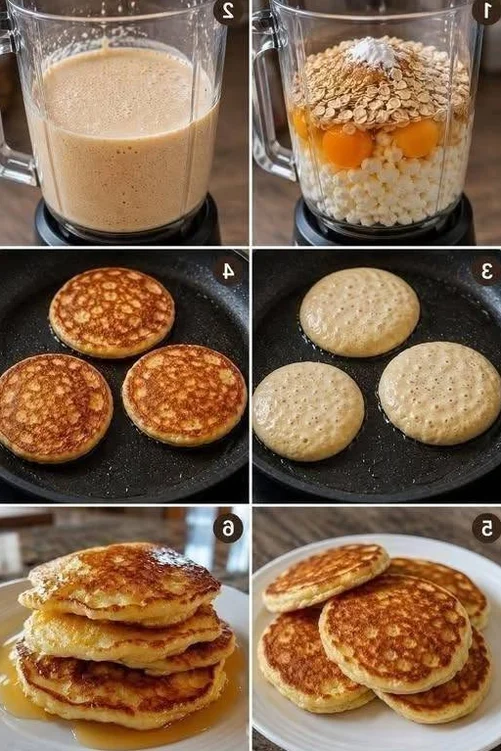
A low-carbohydrate breakfast does not have to be limited to eggs, cheese, or savory foods. Pancakes can also fit into a carbohydrate-conscious eating pattern when traditional wheat flour and sugar are replaced with ingredients that contain fewer digestible carbohydrates. These fluffy keto pancakes are designed to be tender, lightly sweet, satisfying, and simple enough for an ordinary weekend breakfast.
Ingredients
- 2 cups finely ground blanched almond flour
- 4 large eggs
- 1/2 cup unsweetened almond milk
- 1 teaspoon baking powder
- 1 teaspoon pure vanilla extract
- 2 tablespoons keto-friendly sweetener
- 1 small pinch of salt
- 2 tablespoons unsalted butter or coconut oil (for cooking)
Instructions
- Combine the Dry Ingredients: Place the almond flour, baking powder, and salt in a large mixing bowl. Whisk the ingredients together thoroughly. Break apart any compacted pieces of almond flour so the baking powder becomes evenly distributed throughout the mixture.
- Mix the Wet Ingredients: In a separate bowl, crack the four eggs and whisk until the yolks and whites are completely combined. Add the unsweetened almond milk, vanilla extract, and keto-friendly sweetener. Stir until the mixture is smooth and evenly blended.
- Make the Batter: Gradually add the wet mixture to the bowl of dry ingredients. Use a silicone spatula or wooden spoon to combine everything gently. Stop mixing once no large pockets of dry flour remain. The finished batter should be thicker than ordinary wheat-flour pancake batter but still easy to spoon or pour.
- Rest for Five Minutes: Leave the batter undisturbed for approximately five minutes. During this time, the almond flour absorbs some of the liquid and the batter becomes more cohesive. Check the consistency after resting. If it is too thick, add one tablespoon of almond milk at a time until it becomes easier to portion.
- Heat the Skillet: Place a non-stick skillet or flat frying pan over medium-low heat. Allow it to warm gradually for several minutes. Add a small amount of butter or coconut oil and spread it over the cooking surface. The pan should be hot enough for the batter to begin cooking immediately but should never be smoking.
- Portion the Pancakes: Use approximately 1/4 cup of batter for each pancake. Pour the batter gently onto the skillet. If necessary, use the back of a spoon to encourage the mixture into a round shape. Keep the pancakes relatively small.
- Cook the First Side: Cook each pancake for approximately 2–3 minutes without moving it. Look for small bubbles on the surface and edges that have become firmer and slightly drier. Do not rush the flip. If the center still looks extremely wet, give the pancake additional time.
- Flip Carefully: Slide a thin spatula underneath the pancake once the edges look set. Lift and turn it confidently in one motion. Cook the second side for approximately 1–2 minutes, or until the pancake is cooked through and lightly golden. Transfer it to a plate and continue with the remaining batter.
- Serve Warm: Serve the pancakes while they are warm. A simple serving can include a little butter and sugar-free syrup. Berries, nuts, whipped cream, cinnamon, or nut butter can be added according to your preferred carbohydrate and calorie targets.
Notes
Preparation: 10 minutes, Resting: 5 minutes, Cooking: 15 minutes, Total time: About 30 minutes. Servings: 4. Yield: Approximately 12–16 small-to-medium pancakes. Approximate nutrition per serving: Calories: about 440–460, Protein: about 18 g, Total carbohydrates: about 7 g, Dietary fiber: about 6 g, Estimated net carbohydrates: about 1–2 g, Fat: about 38–40 g. Storage: Refrigerate in an airtight container for up to four days or freeze for up to two months. Reheat in a skillet, toaster, or microwave.