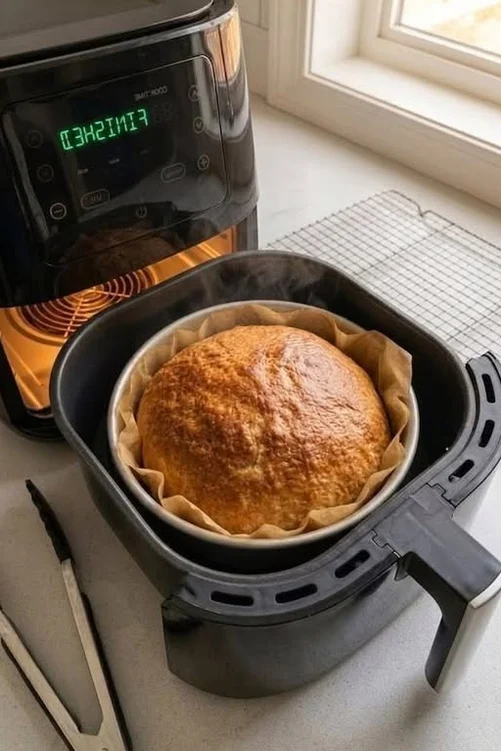
This homemade Air Fryer Bread has a beautifully golden crust and a soft, fluffy center, making it a delicious addition to breakfast, lunch, or dinner. Baking
Equipment
- Air fryer — Circulates hot air around the loaf for baking and browning.
- Small round baking tin — Supports the dough and helps the loaf hold its shape.
- Mixing bowl — Provides space for mixing and proofing the dough.
- Kitchen scale or measuring cups — Helps keep ingredient proportions consistent.
- Dough scraper or spatula — Makes handling sticky dough easier.
- Parchment paper — Helps release the loaf from the tin when used safely.
- Cooling rack — Allows air to circulate under the bread after baking.
Ingredients
- 2 cups (250 g) all-purpose flour or bread flour
- ¾ cup (180 ml) lukewarm water, approximately 100–110°F (38–43°C)
- 1 teaspoon instant yeast
- 1 tablespoon sugar
- ¾ teaspoon salt
- 1 tablespoon olive oil or melted butter, optional
- Bread flour may produce a slightly chewier texture; all-purpose flour works well for a softer loaf.
- If using active dry yeast instead of instant yeast, dissolve it in the lukewarm water with the sugar and allow it to stand for 5–10 minutes until foamy.
- Flour absorbs moisture differently, so add the last tablespoon of water gradually if the dough feels too sticky.
Instructions
1. Mix the dough — 5 minutes
- In a large bowl, combine the flour, instant yeast, sugar, and salt.
- Add the lukewarm water and optional olive oil. Mix until a rough dough forms.
- Texture cue: The dough should feel soft and slightly tacky, not wet and soupy.
2. Knead the dough — 8–10 minutes
- Transfer the dough to a lightly floured surface.
- Knead by hand for 8–10 minutes, or use a stand mixer with a dough hook for approximately 5–7 minutes on low to medium speed.
- The dough should become smoother and more elastic.
3. Let the dough rise — 45–60 minutes
- Place the dough in a lightly greased bowl and cover it.
- Leave it in a warm, draft-free place until it has roughly doubled in size.
- Visual cue: The dough should look puffy and spring back slowly when gently pressed.
4. Shape the loaf — 5 minutes
- Gently press the dough to release large air bubbles.
- Shape it into a round loaf and place it in a lightly greased baking tin lined with air-fryer-safe parchment if desired.
- The tin should leave enough room for the dough to expand.
5. Proof again — 15–25 minutes
- Cover the shaped dough loosely and let it rise until slightly puffy.
- Avoid letting it rise so much that it spills over the tin.
6. Preheat the air fryer — 3–5 minutes
- Preheat the air fryer to 320°F (160°C).
- Check the appliance manual to confirm the recommended baking temperature and whether your tin and parchment are suitable.
7. Bake the bread — 20–30 minutes
- Place the tin in the air fryer basket and bake at 320°F (160°C) for approximately 20–30 minutes.
- Begin checking after 18–20 minutes, because air fryers vary in power and airflow.
- If the top browns too quickly, lower the temperature to 300°F (150°C) and continue baking until the center is cooked.
- Visual cues: The loaf should have a golden-brown top and a firm exterior. For a more reliable check, the center should reach approximately 190–200°F (88–93°C).
8. Cool before slicing — 20–30 minutes
- Carefully remove the tin using oven mitts.
- Let the bread rest for 5 minutes before transferring it to a cooling rack. Cool for another 15–25 minutes before slicing.
- High-protein tip: Serve each slice with eggs, cottage cheese, or thick Greek yogurt to create a more protein-rich breakfast.
Notes
For a softer crust: Brush the top lightly with butter after baking. For a savory loaf: Add dried rosemary, garlic powder, or Italian herbs to the flour. For a heartier loaf: Replace up to half the all-purpose flour with whole-wheat flour, adding water gradually if needed. For a protein boost: Pair with a protein-rich spread or topping; increasing protein in the dough itself may require recipe adjustments. Parchment safety: Use parchment only when secured by the dough or baking tin, and never let loose paper touch the heating element. Allergy notes: This recipe contains wheat and gluten; check any alternative flour or yeast products for additional allergens. Air fryer differences: Basket size, heating element position, and airflow affect the baking time, so use visual cues and an internal-temperature check rather than relying on the timer alone. For a softer crust: Brush the top lightly with butter after baking. For a savory loaf: Add dried rosemary, garlic powder, or Italian herbs to the flour. For a heartier loaf: Replace up to half the all-purpose flour with whole-wheat flour, adding water gradually if needed. For a protein boost: Pair with a protein-rich spread or topping; increasing protein in the dough itself may require recipe adjustments. Parchment safety: Use parchment only when secured by the dough or baking tin, and never let loose paper touch the heating element. Allergy notes: This recipe contains wheat and gluten; check any alternative flour or yeast products for additional allergens. Air fryer differences: Basket size, heating element position, and airflow affect the baking time, so use visual cues and an internal-temperature check rather than relying on the timer alone.
Nutrition
Calories: 145 kcal · Protein: 4 g · Fat: 0.5 g · Carbohydrates: 30 g · Fiber: 1 g · Sugar: 2 g · Sodium: 220 mg