Contents
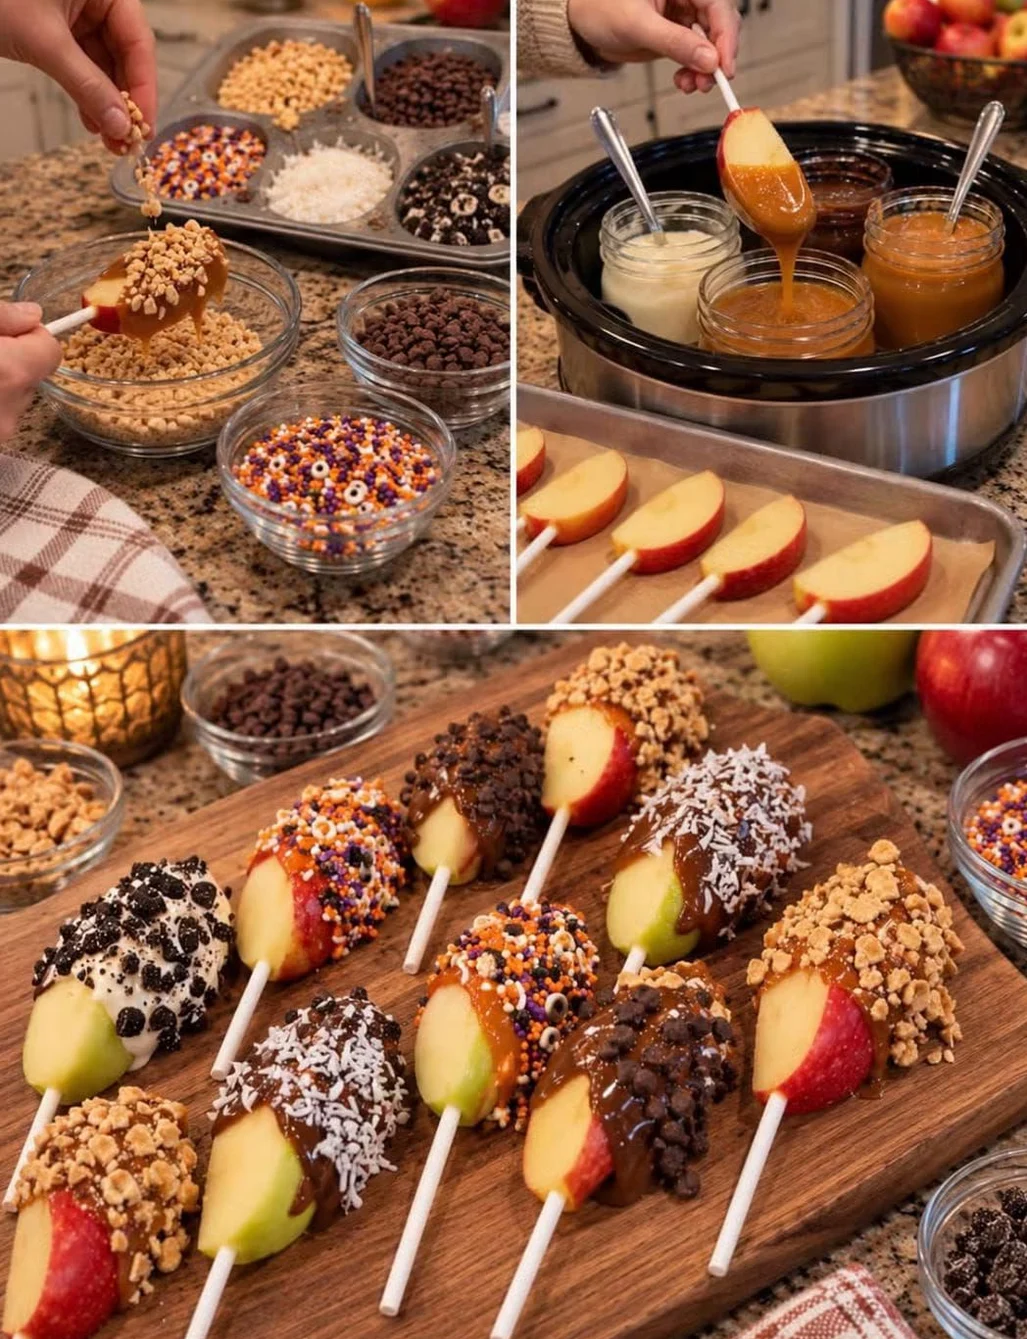
Prep timeare, beautiful to serve, and absolutely irresistible, these Homemade Caramel Apple Pops are just what you need! Shop Candy Gifts Discover more Shop Candy Gifts Find Ice Cream Chocolate Imagine crisp, juicy apple slices covered in rich, buttery caramel, dipped in smooth melted chocolate , and decorated with your favorite toppings. Every bite combines the refreshing taste of fresh apples with the sweetness of caramel and the delicious richness of chocolate. These caramel apple pops are perfect for fall parties, Halloween celebrations, Thanksgiving desserts, Christmas gatherings, school treats, or simply enjoying something special with your family. The best part? You don’t need complicated baking
Ingredients
- 3 large apples (Granny Smith, Honeycrisp, or Fuji)
- 1 cup soft caramel candies
- 2 tablespoons heavy cream or milk
- 1 tablespoon butter
- 1 teaspoon vanilla extract
- 12 wooden popsicle sticks
- 1 cup semi-sweet chocolate chips
- ½ cup milk chocolate chips
- 1 teaspoon coconut oil or vegetable oil
- ¼ cup chopped peanuts or almonds
- ¼ cup crushed pretzels
- 2 tablespoons colorful sprinkles
- 2 tablespoons mini chocolate chips
- A little melted white chocolate for drizzling
- A pinch of sea salt (optional)
Advertisement
Instructions
Step 1: Prepare the Apples
- Wash the apples thoroughly and dry them completely.
- Remove the apple cores and cut each apple into thick slices, approximately ½ inch thick.
- Carefully insert a wooden popsicle stick into the bottom of each apple slice.
- Place the slices on a tray lined with parchment paper.
- Pat the apple surfaces dry with paper towels to help the caramel stick properly.
Step 2: Prepare the Caramel
- Place the caramel candies in a microwave-safe bowl.
- Add the heavy cream and butter.
- Microwave in 20-second intervals, stirring between each interval.
- Continue until the caramel becomes completely smooth and creamy.
- Stir in the vanilla extract.
- Allow the caramel to cool slightly so it thickens but remains easy to dip.
Step 3: Coat the Apple Slices
- Hold each apple slice by its wooden stick.
- Dip it into the warm caramel, coating the surface generously.
- Allow excess caramel to drip back into the bowl.
- Place each coated apple slice onto the prepared parchment paper.
- Refrigerate for approximately 15–20 minutes until the caramel becomes firm.
Step 4: Melt the Chocolate
- Place the semi-sweet and milk chocolate chips in a microwave-safe bowl.
- Add the coconut oil.
- Microwave in 20-second intervals, stirring frequently.
- Continue until the chocolate is completely melted and silky smooth.
- Avoid overheating the chocolate.
Step 5: Dip the Pops in Chocolate
- Remove the caramel-coated apple slices from the refrigerator.
- Dip each slice into the melted chocolate.
- Use a spoon to cover any areas that need extra chocolate.
- Allow the excess chocolate to drip away.
- Return the pops to the parchment-lined tray.
Step 6: Decorate the Apple Pops
- While the chocolate is still soft, decorate each apple pop with your favorite toppings.
- Sprinkle chopped peanuts over the chocolate.
- Add crushed pretzels for a delicious crunch.
- Use colorful sprinkles for a festive appearance.
- Add mini chocolate chips for extra sweetness.
- Drizzle melted white chocolate over the finished pops.
- Finish with a tiny pinch of sea salt for a sweet-and-salty flavor.
Step 7: Chill and Serve
- Place the finished apple pops in the refrigerator for approximately 20–30 minutes, or until the chocolate coating is completely set.
- Arrange them on a beautiful serving platter and enjoy!
Advertisement
Advertisement