Contents
EquipmentIngredientsThe Potato FoundationThe Seasoned Oil EmulsionOptional Gourmet Flavor Finishes (Post-Cook Toss)Instructions1. Precision Mandoline Slicing2. The Vinegar Cold-Water Soak (Starch Extraction: 20 to 30 Minutes)3. Complete Moisture Desiccation (The Critical Step)4. Light Oil Mist & Seasoning Toss5. Stage 1: The Dehydration Bake (Medium Intensity: 150°C / 300°F)6. Stage 2: The Flash-Crisp Finish (High Intensity: 190°C / 375°F)7. Final Toss, Cool, and CrunchNutrition
Prep time& Mandoline Slicing Time 10 minutes Cold Water Starch Extraction Soak 20 to 30 minutes Drying & Desiccation Window 10 minutes (mandatory for crispness) Air Fryer
Cook timeper Batch 12 to 15 minutes (two-stage heat profile)
ServingsApprox. 4 generous snacking bowls (approx. 200 g finished chips)
Equipment
- Countertop air fryer (basket or oven style, 4-quart capacity or larger)
- Handheld or standalone Japanese mandoline slicer (non-negotiable for exact thickness)
- Salad spinner (strongly recommended) or large colander
- Clean lint-free kitchen towels or heavy-duty paper towels
- Large mixing bowl
- Silicone-tipped tongs
- Metal trivet, air fryer rack, or stainless steel butter knife (anti-flyaway anchor)
Ingredients
The Potato Foundation
- 600 g (approx. 3 medium-to-large) Russet or Idaho potatoes, scrubbed thoroughly (peeled or unpeeled according to rustic preference) (Science tip: Russets contain the highest solid starch-to-water ratio; avoid waxy red or new potatoes, which contain too much moisture to crisp).
- 1.5 liters (6 cups) ice-cold filtered water (for the starch-removal bath)
- 1 tbsp (15 ml) distilled white vinegar (lowers water pH, firming pectin chains so chips retain structural crunch without shattering prematurely)
The Seasoned Oil Emulsion
- 1.5 tbsp (22 ml) avocado oil, refined olive oil, or melted beef tallow (high-smoke-point fats with clean flavor profiles)
- 1 tsp (6 g) fine sea salt or pink Himalayan salt (fine salt crystals cling to hot oil; coarse grains bounce off)
- 1/2 tsp (1.5 g) garlic powder
- 1/2 tsp (1.5 g) onion powder
- 1/2 tsp (1.5 g) sweet or smoked paprika (adds appetizing golden-amber color and mild wood-smoke depth)
- 1/4 tsp (0.5 g) freshly cracked black pepper
Optional Gourmet Flavor Finishes (Post-Cook Toss)
- 1 tbsp (8 g) nutritional yeast flakes (for a dairy-free “cheesy” bite)
- 1 tsp (2 g) dried malt vinegar powder or sumac (for classic British salt & vinegar tang)
- 1/2 tsp (1 g) barbecue dry rub or cayenne pepper (for a sweet-and-smoky kick)
- Fresh rosemary, finely minced
Advertisement
Instructions
1. Precision Mandoline Slicing
- Wash the 3 large Russet potatoes under cool water with a vegetable brush. Leave skins on for rustic, earthy rims, or peel them completely for a uniform potato-chip finish.
- Set your mandoline slicer to 1/16-inch (approx. 1.5 mm) thickness.
- Using the safety hand guard, slice the potatoes lengthwise or crosswise into paper-thin, uniform discs.
- Uniformity Rule: Inconsistent slice thickness is the single biggest cause of burnt-and-raw batches. Every chip must be identical so they dehydrate at the exact same rate.
2. The Vinegar Cold-Water Soak (Starch Extraction: 20 to 30 Minutes)
- In a large glass or stainless steel bowl, combine 1.5 liters of cold water, 1 cup of clean ice cubes, and 1 tablespoon of distilled white vinegar.
- Submerge the potato slices into the ice bath, separating any overlapping discs with your fingers.
- Let them soak undisturbed for 20 to 30 minutes .
- You will observe the water turn milky and cloudy as free surface amylose starches precipitate out of the cut cells into the water.
3. Complete Moisture Desiccation (The Critical Step)
- Drain the potato slices in a large colander.
- Transfer the drained slices into a salad spinner and spin vigorously on high for 30 seconds to fling off surface droplets.
- Lay two clean, dry cotton kitchen towels flat across your kitchen countertop.
- Arrange the potato slices across the towels in a single, unstacked layer. Cover with a second set of towels or heavy paper towels.
- Press down firmly with the flats of your hands, patting and rubbing until every slice is completely, bone-dry to the touch . If the potatoes feel damp or clammy, replace towels and repeat.
4. Light Oil Mist & Seasoning Toss
- Place the bone-dry potato slices into a large, clean, dry bowl.
- Drizzle the 1.5 tablespoons of avocado oil evenly over the slices.
- Toss rapidly with your hands for 60 seconds , gently sliding slices apart so every square millimeter receives a microscopic film of oil. (Do not over-oil; excess fat creates a heavy chip that cannot crisp).
- In a small pinch bowl, whisk together the fine sea salt, garlic powder, onion powder, paprika, and black pepper.
- Sprinkle half of the seasoning blend over the oiled potatoes and toss gently to distribute. Save the remaining half for the post-cook finish.
5. Stage 1: The Dehydration Bake (Medium Intensity: 150°C / 300°F)
- Preheat your air fryer to 150°C (300°F) for 2 minutes .
- Place one-third to one-half of the potato slices into the basket. While a slight overlap is acceptable, do not pack the basket more than two slices deep.
- The Anti-Flyaway Trick: High-velocity fans can blow thin potato rounds into the upper heating elements, scorching them. Place a small, clean wire rack or a lightweight stainless steel trivet across the top of the slices to keep them anchored flat during the first few minutes.
- Air fry at 150°C (300°F) for 8 to 10 minutes .
- Every 3 minutes, pull the basket out and shake it vigorously, using silicone tongs to separate any sticking slices.
- Milestone: By minute 8, the slices will look matte, translucent, and will have curled into ruffled chip shapes with almost all water vapor evacuated.
6. Stage 2: The Flash-Crisp Finish (High Intensity: 190°C / 375°F)
- Remove the wire anchor rack.
- Increase the air fryer temperature to 190°C (375°F) .
- Air fry for an additional 3 to 5 minutes , shaking the basket every 60 seconds .
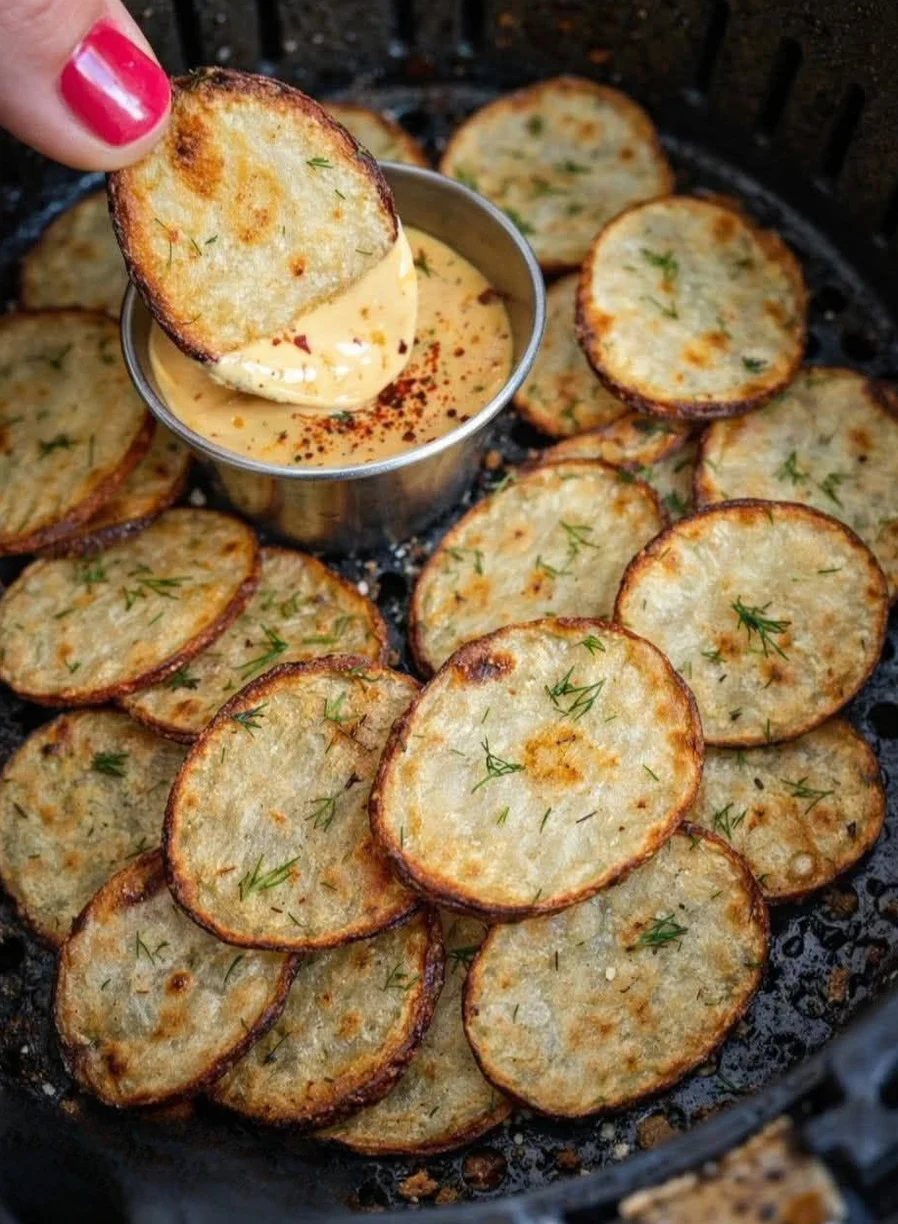
- Watch closely through the viewing window: the pale chips will rapidly toast into an even, bubbling, golden-amber shade.
- The Touch Test: Tap a chip with your tongs; it should feel rigid and firm. (Chips that still feel limp or soft in the center need 1 to 2 more minutes).
- Remove cooked chips using tongs or tip them onto a wide parchment-lined baking tray in a single layer. Repeat steps 5 and 6 for the remaining potato batches.
7. Final Toss, Cool, and Crunch
- While the chips are still hot and glistening with surface oils, sprinkle with the remaining spice blend (or your favorite seasoning powder).
- The 5-Minute Setting Window (Mandatory): Let the chips cool completely on the flat tray for 5 minutes . Like freshly baked cookies, potato chips complete their crisping process as residual heat dissipates and the starch structure hardens into a rigid, crackling snap.
- Transfer to a wide serving bowl and enjoy immediately.
Advertisement
Nutrition
Calories: 158 kcal — · Protein: 3.1 g 6% · Fat: 5.2 g 7% · Carbohydrates: 26.4 g 10% Dietary · Saturated Fat: 0.6 g 3% · Fiber: 2.2 g 8% · Sugar: 0.9 g — Added · Sodium: 420 mg 18%
Advertisement