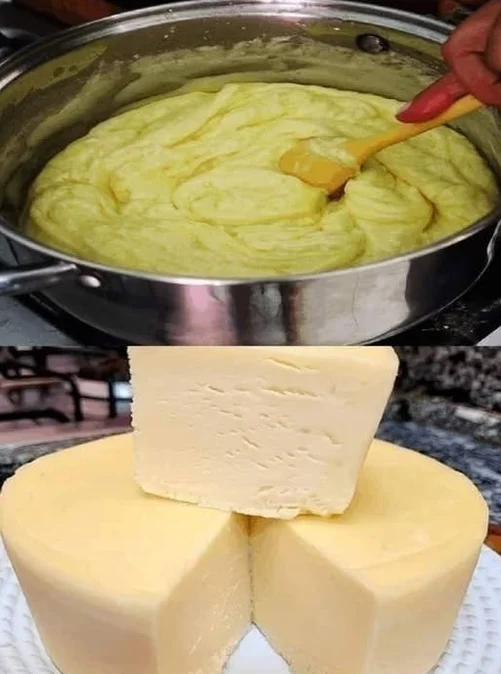
If you’ve ever wanted to make your own cheese at home without complicated tools or expensive ingredients, this easy vinegar cheese recipe is going to blow your mind. It’s rich, creamy, and flavorful — made from nothing more than milk, vinegar, salt, butter, and herbs. With this method, you can turn everyday milk into a delicious homemade cheese that rivals anything you’d find at the store. Best of all, it takes less than an hour from start to finish and doesn’t require any special equipment or starter cultures.
Ingredients
- 1.5 liters milk (6 1/3 cups) (Use full-fat milk for the richest, creamiest texture. Avoid ultra-pasteurized milk, as it may not curdle properly.)
- 2 tablespoons apple cider vinegar (30 ml)
- Salt, to taste
- 50 grams melted butter (1/4 cup)
- 1 tablespoon Provencal herbs (15 ml) (A mix of thyme, oregano, basil, and rosemary)
Instructions
- Pour the milk into a large saucepan and heat it gently over medium flame. Stir occasionally to prevent the milk from scorching at the bottom. You don’t want to boil it — just warm it enough so that steam begins to rise.
- Once the milk is hot (around 80–85°C or 175°F), slowly pour in the apple cider vinegar while stirring. You’ll notice the milk starting to separate — this is when the curds (the solid white bits) form and the whey (the yellowish liquid) appears. Continue stirring for 1–2 minutes, then turn off the heat.
- Cover the pan and let it sit undisturbed for about 10 minutes. During this time, the curds will fully separate from the whey, making it easier to strain.
- Line a colander with a clean cheesecloth or thin cotton towel and place it over a large bowl. Pour the curdled milk mixture through the cloth to separate the curds from the whey. You can save the whey — it’s great for soups, bread dough, or smoothies.
- Rinse the curds gently with cool water to remove the vinegar taste. Then gather the cloth’s edges and squeeze out as much liquid as you can. The drier the curds, the firmer your cheese will be.
- Transfer the warm curds to a clean bowl. Add the melted butter, salt, and Provencal herbs. Mix thoroughly until smooth and evenly seasoned. You can adjust the herbs and salt to suit your taste — add more for a stronger flavor or less for a mild version.
- Spoon the mixture into a small bowl, mold, or container lined with plastic wrap. Press it down gently to remove air pockets. Refrigerate for 2–3 hours until firm.
- Once set, remove the cheese from the mold and slice it. You’ll be amazed by how soft, creamy, and flavorful it is. Enjoy it plain, with crackers, on toast, or in salads.
Notes
Flavor Variations: Garlic & Herb Cheese (Add minced garlic and parsley), Spicy Cheese (Mix in red chili flakes or black pepper), Lemon Cheese (Use lemon juice instead of vinegar), Smoked Cheese (Add a drop of liquid smoke or a pinch of smoked paprika). Tips: Use fresh, full-fat milk for the richest texture. Don’t overheat; boiling can cause the curds to become rubbery. Press longer for firmer cheese. Use the whey wisely for baking or cooking. Storage: Wrap the cheese in parchment paper or plastic wrap and keep it in the refrigerator. It will stay fresh for up to 5 days. For longer storage, freeze it in an airtight container — just thaw it in the fridge before using.