Contents
IngredientsDry IngredientsWet IngredientsFruitOptional Add-InsInstructionsStep 1: Prepare the PanStep 2: Combine the Dry IngredientsStep 3: Prepare the Peanut Butter MixtureStep 4: Combine Wet and Dry MixturesStep 5: Press Into the PanStep 6: BakeStep 7: Cool CompletelyStep 8: Cut Into BarsNotesNutrition
Prep timeare. They make a great breakfast-on-the-go, post-workout snack, afternoon energy boost, or healthier homemade treat. Unlike many packaged snack bars, making them at home allows you to control the sweetness, ingredients, and texture. You can also customize them with nuts, seeds, chocolate chips, coconut, or your favorite dried fruit. Nutritional Information Approximate nutrition per bar, based on 10 bars:
Ingredients
Dry Ingredients
- 2 cups rolled oats
- ¾ cup vanilla or unflavored protein powder
- ½ teaspoon cinnamon
- ¼ teaspoon salt
- ½ teaspoon baking powder, optional
- ⅓ cup chopped peanuts or almonds, optional
- 2 tablespoons chia seeds or ground flaxseed, optional
Wet Ingredients
- ¾ cup natural creamy peanut butter
- ⅓ cup honey or pure maple syrup
- ⅓ cup unsweetened applesauce
- 1 teaspoon vanilla extract
- 2–4 tablespoons milk, as needed
Fruit
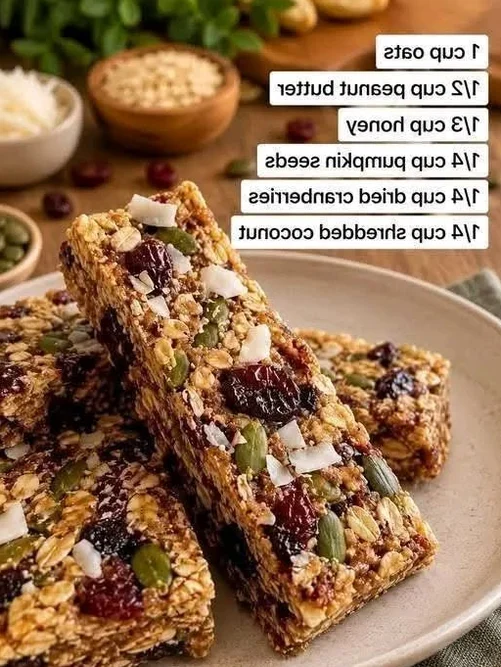
- ½ cup dried cranberries
- 2 tablespoons additional cranberries for topping, optional
Optional Add-Ins
- ¼ cup dark chocolate chips
- 2 tablespoons shredded unsweetened coconut
- 2 tablespoons pumpkin seeds
- 1 tablespoon sesame seeds
- A small pinch of sea salt for topping
Advertisement
Instructions
Step 1: Prepare the Pan
- Preheat your oven to 175°C / 350°F .
- Line an approximately 8 × 8-inch baking pan with parchment paper, leaving some paper hanging over the sides. This will make the finished bars much easier to remove.
- Lightly grease the parchment paper if desired.
Step 2: Combine the Dry Ingredients
- In a large mixing bowl, add:
- Rolled oats
- Protein powder
- Cinnamon
- Salt
- Baking powder
- Chia seeds or flaxseed, if using
- Chopped nuts, if using
- Stir everything together until evenly distributed.
Step 3: Prepare the Peanut Butter Mixture
- Place the peanut butter and honey or maple syrup in a small saucepan over low heat.
- Warm gently for about 1–2 minutes , stirring continuously.
- The goal is simply to loosen the peanut butter and make it easier to combine. Do not bring the mixture to a boil.
- Remove from the heat and stir in:
- Applesauce
- Vanilla extract
- Mix until smooth and creamy.
Step 4: Combine Wet and Dry Mixtures
- Pour the warm peanut butter mixture over the dry ingredients.
- Using a sturdy spatula, mix everything together.
- Add the dried cranberries and gently fold them through the mixture.
- The dough should be thick, moist, and sticky enough to hold together when pressed.
- If it seems too dry, add 1 tablespoon of milk at a time until you reach the right consistency.
- If the mixture becomes too wet, add a little more rolled oats.
- The texture of these bars depends heavily on how you mix and press the ingredients.
- You want the oats to become coated with the peanut butter mixture without turning the entire mixture into a soft batter.
- For chewy bars:
- Use enough moisture to bind the oats but don’t add too much liquid.
- For softer bars:
- Add a little extra applesauce or milk.
- For firmer bars:
- Add an extra tablespoon or two of oats or protein powder.
- For a more dessert-like texture:
- Add a small amount of dark chocolate chips.
Step 5: Press Into the Pan
- Transfer the mixture into your prepared baking pan.
- Use a spatula, the bottom of a glass, or your hands covered with parchment paper to press the mixture down firmly.
- This step is extremely important.
- Press the mixture into an even, compact layer. If you don’t press it firmly enough, the bars may crumble after baking.
- Sprinkle additional cranberries, chopped peanuts, or a few chocolate chips over the top if desired.
- Press the toppings gently into the surface.
Step 6: Bake
- Place the pan in the preheated oven.
- Bake for approximately 15–20 minutes .
- The edges should look lightly golden, while the center should still have a little softness.
- Avoid overbaking. Protein bars can become dry if they are left in the oven too long.
Step 7: Cool Completely
- Remove the pan from the oven and place it on a cooling rack.
- Allow the bars to cool completely in the pan.
- For an even firmer texture, refrigerate them for 30–60 minutes after cooling.
- Once firm, lift the entire slab out using the parchment paper.
Step 8: Cut Into Bars
- Using a sharp knife, cut the mixture into 10 bars or 12 smaller snack bars .
- For clean cuts, wipe the knife between slices.
- You can make them rectangular like traditional protein bars or cut them into small squares for bite-sized snacks.
Advertisement
Notes
Store in an airtight container for approximately 2–3 days . For longer storage, keep the bars refrigerated in an airtight container for approximately 5–7 days . For longer-term storage, individually wrap the bars and freeze them for up to 2–3 months . Allow them to thaw in the refrigerator or at room temperature before eating.
Nutrition
Calories: 240–260 kcal · Protein: 12–15 g · Fat: 9–11 g · Carbohydrates: 27–30 g · Fiber: 3–4 g · Sugar: 8–10 g
Advertisement