Contents
IngredientsFor the Dough:For Dusting and Topping:InstructionsStep 1: Mixing the Dry Ingredients and SeedsStep 2: Combining Wet and Dry IngredientsStep 3: The Long Fermentation (Bulk Rise)Step 4: Shaping the LoafStep 5: The Secondary ProofStep 6: Preheating the Dutch OvenStep 7: Scoring and BakingStep 8: Cooling and StoringNutrition
Prep time15 minutes
Total timeApproximately 15 hours
Servings1 large round loaf (about 12–14 generous slices)
Ingredients
For the Dough:
- 3 cups (360g) unbleached all-purpose flour (or substitute up to 1 cup with bread flour for a chewier texture)
- ½ cup (60g) whole wheat flour or rye flour for added depth
- 1 ¼ teaspoons active dry yeast or instant yeast
- 1 ½ teaspoons fine sea salt or kosher salt
- ½ cup mixed raw seeds (a blend of sunflower seeds, pumpkin seeds/pepitas, golden flaxseeds, and brown flaxseeds)
- ¼ cup toasted sesame seeds
- 3 tablespoons raw chia seeds or poppy seeds
- 1 ½ cups (360ml) lukewarm water (around 105°F to 110°F)
- 1 tablespoon honey, maple syrup, or dark molasses (optional, to feed the yeast and promote a deep brown crust)
For Dusting and Topping:
- ¼ cup extra mixed seeds for the top crust
- ¼ cup rice flour or coarse cornmeal (for dusting the proofing basket to prevent sticking)
Advertisement
Instructions
Step 1: Mixing the Dry Ingredients and Seeds
- In a large mixing bowl, whisk together the unbleached all-purpose flour, whole wheat flour, instant yeast, and fine sea salt until thoroughly combined. Add your medley of raw seeds—sunflower seeds, pumpkin seeds, flaxseeds, chia seeds, and sesame seeds—directly into the dry flour mixture. Toss them around with a spatula or your hands to ensure that the seeds are evenly distributed throughout the dry ingredients, preventing clumps later on.
Step 2: Combining Wet and Dry Ingredients
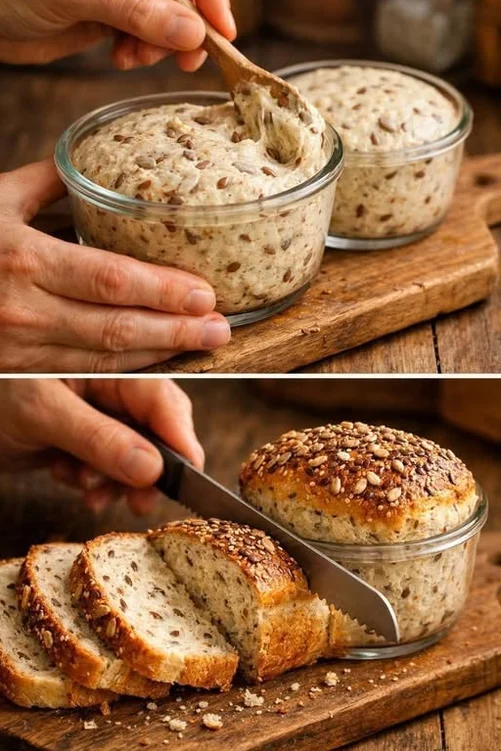
- In a separate small container or measuring cup, combine the lukewarm water and the optional tablespoon of honey or maple syrup, stirring until dissolved. Pour the liquid mixture all at once into the dry flour and seed blend. Using a wooden spoon, a stiff spatula, or your hands, stir the mixture just until a wet, sticky, and shaggy dough forms and no pockets of dry flour remain. The dough will look quite wet and unruly—do not panic, as this high hydration is the secret to a moist interior and a bubbly crumb.
Step 3: The Long Fermentation (Bulk Rise)
- Cover the large mixing bowl tightly with plastic wrap, a reusable silicone lid, or a damp kitchen towel to lock in moisture. Place the bowl in a draft-free spot at room temperature (ideally between 68°F and 72°F) and let it rest undisturbed for 12 to 18 hours . During this extended rest, the yeast will ferment slowly, breaking down starches, developing complex sourdough-like flavors, and creating a bubbly, airy structure inside the dough. You will know it is ready when the surface is dotted with bubbles and the volume has more than doubled.
Step 4: Shaping the Loaf
- Generously dust a clean work surface, a dough scraper, and your hands with all-purpose flour or rice flour, as the fermented dough will be quite sticky. Gently deflate the dough by releasing it from the sides of the bowl and turning it out onto your floured surface. Fold the outer edges of the dough toward the center like an envelope, then gently roll it over so the seam side faces down. Using your hands, cup the dough and drag it gently across the counter toward you to create surface tension, forming a smooth, tight round boule.
Step 5: The Secondary Proof
- Line a proofing basket (banneton) or a medium bowl with a clean cotton or linen kitchen towel, and dust it heavily with rice flour or cornmeal. Carefully place your shaped dough into the basket seam-side up . Cover the basket loosely with a towel and let the dough rise for a second time at room temperature for 2 hours , or until it is puffy and springs back slightly when gently pressed with a fingertip.
Step 6: Preheating the Dutch Oven
- About 45 minutes before your second rise is complete, place a heavy 4-to-6-quart cast-iron Dutch oven with its matching lid securely on the middle rack of your oven. Turn your oven on and preheat it to 450°F (230°C) . Preheating the heavy vessel is essential because it traps steam released from the high-hydration dough, mimicking a professional steam-injected bakery oven to give your loaf a phenomenal crust.
Step 7: Scoring and Baking
- Carefully remove the blazing hot Dutch oven from the oven and take off the lid. Invert your proofed loaf gently out of the basket and directly onto a sheet of parchment paper (this acts as a convenient sling to lower the dough safely into the piping hot pot). Using a sharp lame, razor blade, or a very sharp knife, make a single decisive, shallow slash (about ¼-inch deep) across the top of the dough to allow for controlled expansion during baking.
- Using the edges of the parchment paper, lift the dough and lower it straight down into the hot Dutch oven. Cover the pot securely with its lid and return it to the oven. Bake covered for 30 minutes , which traps the steam and allows the bread to achieve maximum oven spring. After 30 minutes, carefully remove the lid to release the steam, and continue baking uncovered for another 15 to 20 minutes , until the crust turns a rich, deep mahogany-brown and sounds hollow when tapped on the bottom.
Step 8: Cooling and Storing
- Remove the Dutch oven from the oven, and use your parchment sling to lift the baked loaf out of the pot immediately. Place the bread on a wire cooling rack and let it cool completely for at least 1 to 2 hours before slicing. Slicing into hot bread can compress the delicate crumb structure and make the interior gummy, so patience here yields the best texture. Once cooled, store the bread in a paper bag or a breathable linen bread bag at room temperature for up to 3 days, or slice and freeze individual portions for later toast.
Advertisement
Nutrition
Calories: ~185 kcal · Fat: 6.5 g Saturated Fat: 0.8 g · Saturated Fat: 0.8 g Polyunsaturated · Sodium: 295 mg
Advertisement